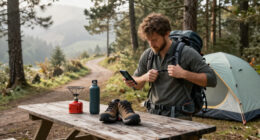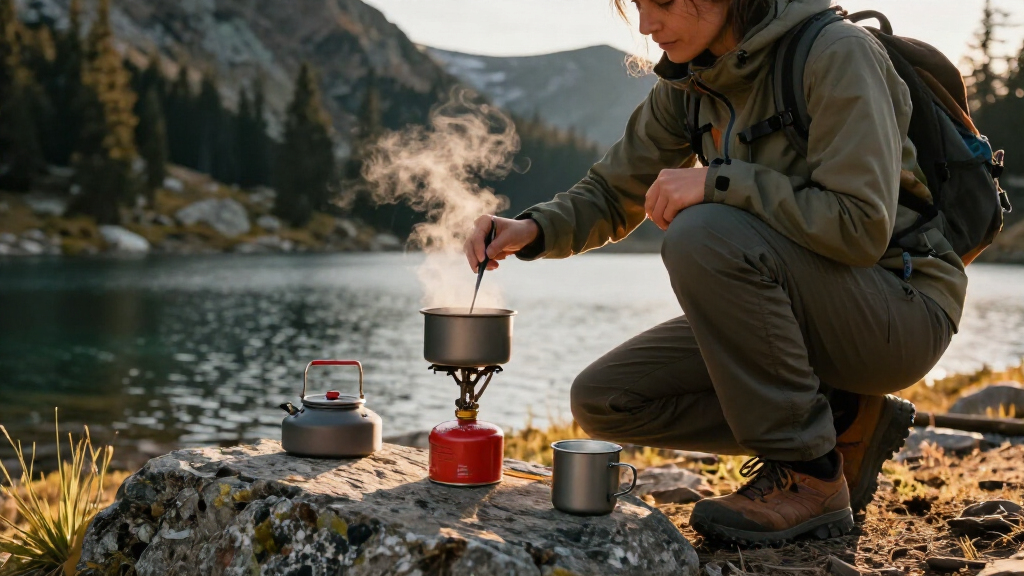

Choose a compact portable camping stove that fits your trip, then practise setting it up, lighting it, cooking on it, and packing it away. This guide is for beginners who want a reliable way to heat water or cook simple meals at a campsite. Allow 30-60 minutes to check compatibility, read the stove instructions, and practise outdoors before your trip. Safe use depends on matching the fuel to the stove, choosing a stable outdoor cooking spot, and following the manufacturer’s directions.

Get travel and outdoor gear delivered free with Prime
- Fast, free delivery on millions of items
- Prime Video, Amazon Music and more included
- Member-only deals all year

AOTU Portable Camping Stove with Piezo Ignition
- ✔ Fuel compatibility: 7/16-thread EN 417 butane or butane-propane mixed-fuel canisters
- ✔ Maximum output: 3000 W
- ✔ Weight: 110 g (3.84 oz)
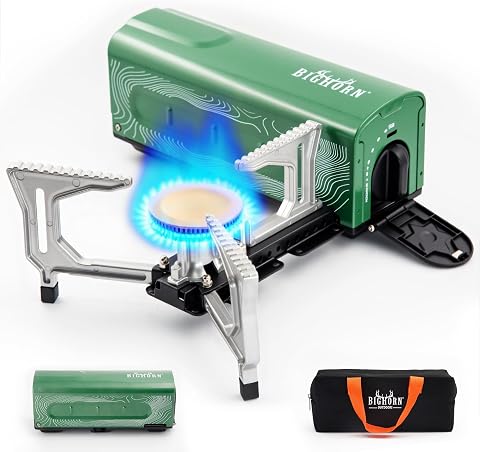
BIG HORN OUTDOORS Butane Camping Stove, Portable Folding Gas Burner with Carry Bag for Camping, Emergency Use and Outdoor Cooking
- ✔ Fuel type: Butane
- ✔ Maximum output: 2200 W (7500 BTU)
- ✔ Design: Folding bucket-style stove

Gas One GS-1000G Portable Butane Camping Stove with Carrying Case
- ✔ Fuel requirement: 8 oz butane canister, sold separately
- ✔ Maximum output: 7,650 BTU
- ✔ Ignition: Piezo electric
Difficulty: Beginner | Time: 30-60 minutes to prepare and practise; cooking time varies
What You’ll Need
Tools & Materials:
- Compact camping stove with its instructions
- Fuel specified by the stove maker
- Stable, heat-resistant cooking surface
- Compatible pot or pan
- Lighter or matches if the stove does not have a working igniter
- Water and a way to extinguish a small fire
Knowledge:
- Basic familiarity with handling a lighter or matches
- Ability to identify the stove’s fuel type and controls
- Awareness of local fire restrictions and campsite rules
Check the stove manual and local fire rules before packing. Stove models differ: some connect to a threaded fuel canister, some use a remote canister or liquid fuel, and some burn wood. Fuel containers and parts are not interchangeable unless the manufacturer says they are. Never use a stove inside a tent, vehicle, camper, or other enclosed space; flames can start a fire, and combustion can produce carbon monoxide.
Inspect the stove and fuel container at home. Do not use equipment with a damaged hose, loose connection, heavy rust, dented fuel canister, or signs of leakage. Pack fuel upright and away from heat, following its label and transport rules. Bring enough fuel for the planned meals, with a reserve based on the stove maker’s usage guidance and likely wind and temperature.
AOTU Portable Camping Stove with Piezo Ignition
The AOTU is the strongest match for hikers who count every gram and still want a controllable cooking flame. Its listed 110 g weight and small storage case make it far easier to pack than either tabletop-style alternative here. The adjustable valve is useful when a trip involves more than boiling water: we can reduce the flame for gentler cooking rather than relying only on full output. Its wind-resistant burner design also addresses a common outdoor annoyance, though it cannot remove the effect of exposed, gusty conditions.Compared with the BIG HORN and Gas One, this is a burner built around minimal carry weight, not a broad, heavy base. The specified 9.5 cm burner plate is intended for cookware up to 20 cm, so it is better paired with compact backpacking pots than oversized pans. Fuel compatibility also needs attention: it takes 7/16-thread EN 417 butane or butane-propane mixed-fuel canisters and does not fit propane canisters. Choose it when packability matters most; skip it if your cooking kit depends on large cookware or a propane setup.
Pros:
- Listed weight is only 110 g, making it the lightest option in this comparison.
- Adjustable flame control supports both high heat and lower simmering.
- Wind-resistant burner design is suited to exposed outdoor cooking.
- Includes a plastic storage case for packing and protection.
Cons:
- Does not fit propane canisters; it requires compatible 7/16-thread EN 417 fuel.
- The specified burner plate is intended for cookware up to 20 cm in diameter.
- Small burner format offers less support for bulky pots than the tabletop alternatives.
Best for: Backpackers and hikers who want a very light stove, adjustable flame and a small case for compact cookware.
Not ideal for: Campers using propane canisters, cookware wider than the stated 20 cm limit, or anyone who needs a wide, freestanding cooking platform.
Bottom line: For weight-conscious trips with compact cookware, the AOTU offers the best balance of packability and flame control in this lineup.
“For weight-conscious trips with compact cookware, the AOTU offers the best balance of packability and flame control in this lineup.”
BIG HORN OUTDOORS Butane Camping Stove, Portable Folding Gas Burner with Carry Bag for Camping, Emergency Use and Outdoor Cooking
The BIG HORN takes a different route to portability: its bucket-style body folds down for storage, while the cast-iron trivet gives cookware a more supported perch than the AOTU’s compact burner plate. That combination makes it a sensible middle ground for car camping, picnic tables and emergency kits where we want a transportable stove but are not carrying it deep into the backcountry. A carry bag is included, and the burner construction combines cast iron, copper and aluminum.Its stated output is 2200 W, below the AOTU’s 3000 W and the Gas One’s 7,650 BTU figure, although output figures alone do not establish how quickly a meal will cook in real conditions. The product description claims rapid boiling, but fuel, cookware and weather all affect results. We should also account for the separate butane canister, which adds another item to pack. Compared with the Gas One, BIG HORN leans on folding structure and a stable trivet; compared with AOTU, it is less compelling for long-distance carrying. The listing describes SGS certification, but buyers should confirm the certification details and the required canister format before relying on it.
Pros:
- Folding bucket-style design packs down for transport and storage.
- Stable cast-iron trivet supports cookware more broadly than a tiny backpacking burner.
- Burner combines cast iron, copper and aluminum for heat distribution.
- Carry bag is included.
Cons:
- Requires a separate butane canister, adding weight and volume to the kit.
- Listed 2200 W output is lower than AOTU’s stated wattage.
- Weight, dimensions and ignition method are not specified in the supplied details.
Best for: Campers who want a folding stove with a stable trivet for use at a campsite, picnic table or in an emergency kit.
Not ideal for: Backpackers prioritizing the lightest setup, or buyers who need a supplied fuel canister or clearly stated ignition details.
Bottom line: The BIG HORN is a practical choice when a folding form and steadier pot support matter more than minimum pack weight.
“The BIG HORN is a practical choice when a folding form and steadier pot support matter more than minimum pack weight.”
Gas One GS-1000G Portable Butane Camping Stove with Carrying Case
Gas One is the most fully specified option for cooks who prefer a familiar tabletop layout and straightforward ignition. The piezo electric igniter removes the need to bring matches or a lighter, and its safety shut-off and fuel cartridge ejection feature add useful safeguards around the butane canister. The stove is CSA listed and comes with a carrying case and user manual. Its 7,650 BTU output and adjustable heat control make it suited to camp meals that need more than a quick boil.Those conveniences come with a real portability cost. At 3.1 lb and 13.5 × 11 × 4.45 in, it is substantially heavier and larger than the AOTU, so we would favor it for car camping or a short carry from vehicle to table rather than a backpacking route. BIG HORN also folds and includes a bag, while Gas One’s distinguishing edge is its listed ignition and safety detail. The required 8 oz butane canister is sold separately, and the product is specified for outdoor use only. It makes sense when controls and safety features outweigh minimal bulk, but not when compactness means carrying the stove on foot for miles.
Pros:
- Piezo ignition works without a separate match or lighter.
- Safety shut-off and fuel cartridge ejection feature are specified.
- CSA listed and includes a carrying case and user manual.
- Adjustable heat control and 7,650 BTU output support camp cooking.
Cons:
- At 3.1 lb, it is much heavier than the AOTU backpacking stove.
- Requires an 8 oz butane canister sold separately.
- Specified for outdoor use only.
Best for: Car campers who want push-button ignition, adjustable heat and specified cartridge safety features in a portable tabletop stove.
Not ideal for: Backpackers, buyers seeking a stove with the smallest carry footprint, or anyone needing indoor cooking equipment.
Bottom line: Choose the Gas One when ignition and cartridge safety features matter more than minimizing weight and packed size.
“Choose the Gas One when ignition and cartridge safety features matter more than minimizing weight and packed size.”
As an Amazon Associate we earn from qualifying purchases.
Before You Start
Read the lighting, shutdown, cleaning, and storage instructions for your exact stove. At the campsite, use the designated cooking area when one is provided, and follow any fire ban or stove restriction. Set up on bare, level ground or a stable table away from dry grass, branches, tents, and foot traffic. Keep children and pets clear while the stove is lit. Do not improvise a windscreen around a canister stove: trapped heat can overheat the fuel container. Use only a wind guard approved for that model.
Step-by-Step Instructions
Step 1: Match the stove to your trip
Choose a stove based on the meals you plan to make, the number of people, and how you will travel. A small integrated burner canister stove packs easily and suits boiling water or cooking with a small pot. A wider burner or remote-canister model can feel steadier with larger cookware. A liquid-fuel stove may suit trips where refillable fuel is practical, but it needs more setup and care. A wood-burning stove avoids carrying fuel only where wood collection and open-flame use are allowed.
Check the packed size, weight, cooking capacity, simmer control, and the stove’s stated fuel type. If you already own fuel, confirm the stove accepts that exact kind and connection. Consider cold weather and wind: performance can drop, and some fuel types work poorly in low temperatures. Use the maker’s guidance for the expected conditions.
Tip: Do not choose by burner size alone. Confirm that your usual pot sits securely on the supports and that the stove is suitable for the conditions you expect.
Check: You can name the stove’s fuel type, confirm a compatible container or supply, and identify cookware that fits its supports.
Step 2: Inspect the stove and fuel
Place the stove parts on a clean, dry surface and check them against the manual. Look for cracks, bent pot supports, blocked burner openings, damaged seals, loose fittings, or a frayed fuel hose. Check the fuel label, expiration guidance if given, and container condition. Keep the fuel valve closed while inspecting. If anything is damaged or you smell fuel, move away from flames and do not operate the stove.
Confirm that the ignition system works as described. If the model requires a separate lighter or matches, pack a working backup in a dry container. Keep fuel away from the cooking area until you are ready to connect it.
Tip: Never test for a fuel leak with a flame. Follow the manual’s leak-check method, if it provides one.
Check: The stove and fuel container appear undamaged, the fuel matches the stove, and you have a reliable way to ignite it.
Step 3: Set up on stable ground
Move to the campsite’s permitted cooking location. Clear away leaves, needles, paper, and other burnable material, then place the stove on a level, heat-resistant surface. Extend and lock the pot supports as directed. Set the fuel canister or bottle in its specified position, away from direct burner heat. Keep the cooking area open to outside air and position it where wind will not blow the flame toward people or dry vegetation.
Check that the stove cannot tip if the pot is nudged. Keep the pot size within the manufacturer’s limits. Do not place the stove inside a tent vestibule, under low branches, or on a surface that can melt or burn.
Tip: A level patch of firm ground is safer than a narrow rock or an unstable camp table. Do not use a makeshift platform that can shift under a full pot.
Check: The stove sits flat without wobbling, the fuel is positioned as instructed, and the cooking area is clear and outdoors.
Step 4: Connect the fuel and check the setup
With the control valve closed, connect the fuel supply exactly as the manual describes. Keep the connection away from sparks, cigarettes, and other flames. Tighten only as directed; forcing a fitting can damage it. If the manufacturer calls for a leak check, perform it using the specified method before lighting. Stop immediately if you hear hissing, detect a fuel smell, or see bubbling during an approved soapy-water check. Close the valve if safe, disconnect only as the manual directs, and move the fuel away from ignition sources.
Keep the manual’s recommended clear space around the burner. Put the pot nearby, but do not place it on the stove until the supports are ready and stable.
Tip: Fuel connections vary by model. Do not add adapters or substitute seals unless the stove maker approves them.
Check: The connection is secure by the manufacturer’s instructions, with no fuel odor, hissing, or other sign of a leak.
Step 5: Light the stove and adjust the flame
Follow the stove’s lighting sequence in the manual. For many models, you open the valve slightly and ignite the burner promptly with the built-in igniter or a lighter. Keep your face and hands away from the burner, and open the valve only as far as directed. If the stove does not light after a brief attempt, close the valve and wait the time specified in the manual before trying again. Do not keep releasing fuel while looking for a spark.
Once lit, adjust the control gradually. Use a low, steady flame for simmering and a higher setting only when needed. Place the pot centrally on the supports, using cookware that does not overhang the burner excessively. Stay beside the stove while it is operating.
Tip: A flame that lifts, flares, or behaves erratically may indicate wind, a poor connection, or a fault. Turn the stove off if the flame is unstable.
Check: The burner produces a steady flame beneath the pot, and the stove remains stable without unusual odor or sound.
Step 6: Cook while monitoring the stove
Keep the pot centered and use a lid to reduce cooking time and fuel use. Stir food as needed, and turn the flame down before stirring or moving the pot. Keep handles turned away from walkways. Do not leave a lit stove unattended, and keep clothing, towels, and fuel containers clear of the flame and hot surfaces.
If wind affects the flame, move to a permitted sheltered spot or use a manufacturer-approved wind guard while keeping the fuel container outside the heated area. Do not surround a canister with a barrier. If the stove flares or fuel leaks, close the valve only if you can do so safely, move people away, and follow the stove maker’s emergency instructions.
Tip: Use only cookware within the stove’s stated size and weight limits. A wide pot can reflect heat toward the burner or fuel container.
Check: Food heats as expected, the flame stays controlled, and the fuel container remains away from excessive heat.
Step 7: Shut down, cool, and pack
Turn off the stove using the manual’s shutdown procedure. On many models, this means closing the fuel valve and waiting until the flame goes out; use the exact sequence specified for yours. Do not touch or disconnect hot parts. Let the burner and pot supports cool fully, then disconnect and store the fuel as the instructions and fuel label direct. Keep a partly used canister upright and protected from heat or impact.
Wipe food residue from the cooled stove with the recommended method. Check that the burner openings are clear without pushing debris deeper into them. Pack the stove dry in its case, separate from food and items that could damage its parts. At home, store fuel and stove components according to their labels and local rules.
Tip: Do not pack a warm stove beside fuel, tent fabric, or other heat-sensitive items.
Check: The flame is out, the stove is cool before handling, fuel is secured, and the packed stove is clean and dry.
Common Mistakes to Avoid
- Connecting a fuel canister that looks compatible but has the wrong thread or fuel type. — Read the stove and fuel labels before the trip. Use only the fuel and connection approved for that model, and never force a fitting.
- Cooking on uneven ground or using a pot that is too large for the supports. — Choose a firm, level surface and check the cookware limits in the stove manual before lighting.
- Using a tight windscreen around a canister stove. — Use only a guard approved for the stove, and keep the fuel container out of reflected or trapped heat.
- Trying repeatedly to ignite a stove while fuel continues to escape. — Close the valve after a failed attempt, wait as directed, and check the setup before trying again. Stop if you smell fuel or hear hissing.
Troubleshooting
Problem: The stove will not light.
Solution: Close the valve and wait the period stated in the manual. Check that the fuel supply is compatible and connected, the valve is in the correct position, and the igniter is dry and working. Use a backup lighter only if the manual permits it. Stop if fuel odor or hissing is present.
Problem: The flame is weak or keeps going out.
Solution: Turn the stove off and check for wind, a loose connection, low fuel, or a blocked burner, following the manual. Move to a permitted sheltered area and clean only as instructed. Cold conditions can reduce performance for some fuels; follow the manufacturer’s cold-weather guidance.
Problem: The stove or fuel connection smells of fuel.
Solution: Do not light it or operate nearby flames. Close the valve if you can do so safely, move people away, and follow the model’s leak instructions. Do not use the stove again until the cause has been identified and the equipment is safe.
Problem: The pot wobbles or the stove starts to tip.
Solution: Turn off the burner if it is safe, keep clear of hot cookware, and wait for the stove to cool. Move it to level, firm ground and use a pot within the stove’s size limits before relighting.
What Success Looks Like
You have completed the task when you can identify the correct fuel, assemble the stove as directed, light it outdoors on stable ground, maintain a controlled flame under compatible cookware, shut it down in the correct order, and pack it only after it has cooled. During use, the stove stays upright, the fuel connection has no leak signs, and the cooking area remains clear of burnable items. If any of these checks fail, stop using the stove and consult its manual or the manufacturer.
Next Steps
Before leaving, check the fuel supply against the meals and conditions planned for the trip. At camp, follow fire restrictions each day because rules can change. After the trip, clean and dry the stove, inspect its fittings and supports, and store the fuel according to its label and local requirements. Replace damaged parts only with approved components. If the stove continues to leak, flare, or malfunction, keep it out of service and contact the manufacturer or a qualified repair provider.
Frequently Asked Questions
Can I use a compact camping stove inside my tent?
No. Use it outdoors in a permitted cooking area. A tent or vehicle can trap heat and combustion gases, including carbon monoxide, and a flame can ignite fabric or gear.
How much fuel should I bring?
Use the stove maker’s fuel-use guidance and estimate how many meals and boils you will prepare. Allow extra for wind, cold, longer cooking times, and delays. Follow transport and storage rules for the fuel you choose.
Can I use another brand’s fuel canister?
Only if the canister has the fuel type and connection approved for your stove. Check both labels and the stove manual. Do not force a fitting or use an unapproved adapter.
Can I use a windscreen with a canister stove?
Use one only if the stove maker approves that specific style. A windscreen can trap heat around a fuel canister and raise its temperature. Never enclose the canister or place a barrier where it reflects burner heat onto the fuel.
What should I do if the igniter fails?
Close the valve and follow the manual’s waiting period before another attempt. If the manual allows manual lighting, use a working lighter or match while keeping your hands and face clear. Stop if you smell fuel, hear a leak, or cannot light the stove promptly.
Fall Picks

DJI Osmo Action 5 Pro Essential Combo Waterproof 4K Action Camera
As an affiliate, we earn on qualifying purchases.