Grasping the model glider fills me with excitement. In this guide, I will explain how to launch a model glider with precision and grace.
From gathering the necessary equipment to mastering the art of throwing, I will provide you with step-by-step instructions to ensure a successful flight.
With a keen eye for balance and trim, and a thorough understanding of wind patterns, you will be able to unleash the full potential of your glider.
So, let’s embark on this exhilarating journey and soar through the skies!
Key Takeaways
- Headwind provides lift for smooth takeoff, while tailwind makes launching more challenging.
- Different launch techniques are affected by wind patterns, and the optimal launch speed varies with wind conditions.
- Launch height affects glider performance, with higher launch heights allowing more time for altitude gain and lower launch heights reducing exposure to strong gusts.
- Balancing the glider for stability, understanding airfoil design for lift and drag reduction, troubleshooting common launch problems, and learning glider aerodynamics are all important for a successful launch and enjoyable flight experience.
Top picks for "launch model glider"
Open Amazon search results for this keyword.
As an affiliate, we earn on qualifying purchases.
Gather Your Equipment
Now, you’ll need to gather all of your equipment for launching the model glider. Equipment preparation is crucial for a successful launch.
First, ensure that your glider is in optimal condition by conducting regular maintenance. Check the wings for any cracks or damage and repair them if necessary. Make sure the control surfaces are aligned properly and the hinges are secure.
Next, gather your launch equipment, including a sturdy launch stand or catapult, rubber bands, and a launch hook. Inspect these items for any signs of wear and replace them if needed. Additionally, have a backup set of rubber bands and launch hooks on hand in case of emergencies.
With your equipment prepared, you are now ready to find the perfect launch location, where you can maximize the glider’s flight potential.
Find the Perfect Launch Location
First, you’ll need to scout for an ideal spot to release your model glider into the air. Finding the right wind conditions is crucial for a successful launch. Look for an area with open space, away from obstacles such as trees or buildings, to ensure a smooth takeoff.
Consider the wind direction and speed. You want to choose a launch direction that aligns with the wind, as this will provide the necessary lift for your glider to soar through the air. Take note of any gusts or turbulence in the area, as these can affect the stability of your glider during launch.
Once you have identified the perfect launch location, it’s time to prepare your glider for flight.
Prepare Your Glider for Flight
To get your aircraft ready for takeoff, make sure you’ve double-checked all the components and ensured they are securely in place.
Glider maintenance is crucial for a safe and successful launch. Start by inspecting the wings for any cracks or damage. Check the control surfaces, such as the ailerons and elevator, to ensure they move smoothly and are properly attached. Examine the fuselage for any loose or missing parts. It’s important to also check the balance of your glider to ensure stability during flight. Additionally, make sure the launching mechanism is in good condition and securely attached to the glider.
By maintaining your glider and ensuring all components are in place, you can minimize the risk of any mid-air failures or accidents.
Now, let’s move on to mastering your throwing technique for a successful launch.
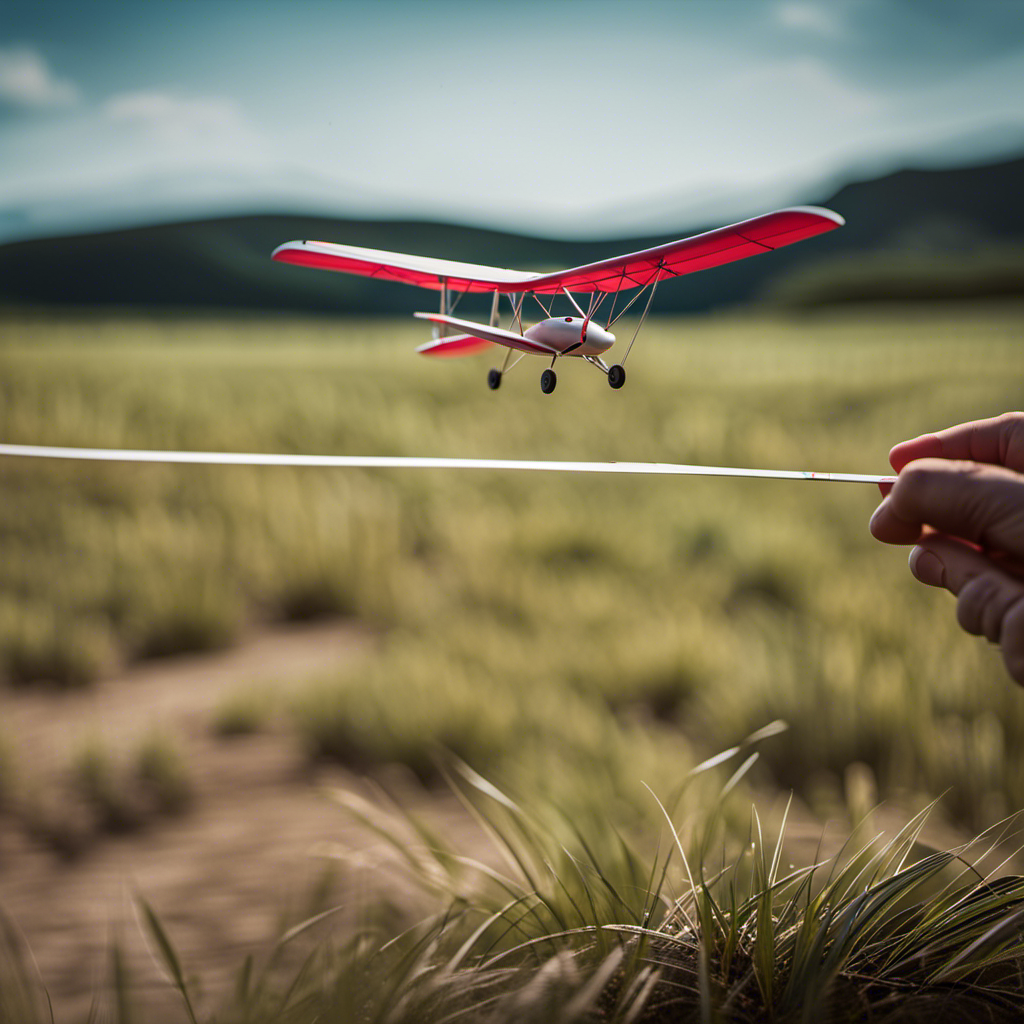
Master Your Throwing Technique
You’ll want to practice your throwing technique to ensure a smooth and controlled flight. The way you throw your model glider can significantly impact its launching distance. To maximize the distance, start by gripping the glider with your thumb and fingers positioned near the center of gravity.
As you prepare to launch, stand with your feet shoulder-width apart, facing the direction you want the glider to fly. With a smooth and fluid motion, extend your arm forward, releasing the glider at the highest point of your throw. Remember to maintain a straight and level trajectory, avoiding any unnecessary tilting or spinning.
By perfecting your throwing technique, you can achieve longer launching distances and improve the overall performance of your model glider.
Now, let’s discuss how to adjust your launch angle.
Adjust Your Launch Angle
Once you’ve mastered your throwing technique, adjusting your launch angle becomes the next step to optimize your model glider’s flight. Finding the optimal launch angle is crucial for achieving maximum distance and stability.
Here are some key considerations when adjusting your launch angle for different glider designs:
-
Wing configuration: Different glider designs have varying wing shapes and sizes, which affect the ideal launch angle. Experiment with different angles to find the sweet spot for your specific glider.
-
Weight distribution: The center of gravity plays a significant role in determining the launch angle. Adjusting the weight distribution by adding ballast or shifting the position of the weights can help fine-tune the launch angle.
-
Wind conditions: Launching into headwinds requires a higher launch angle to generate lift, while tailwinds may require a lower angle to prevent the glider from stalling.
-
Glide performance: Gliders with a higher glide ratio typically benefit from a lower launch angle, allowing them to stay aloft for longer periods.
-
Trim adjustments: Fine-tuning the trim of your glider, such as adjusting the elevator or rudder, can also affect the optimal launch angle.
As you become more familiar with adjusting the launch angle, it’s important to practice launching in different weather conditions to further refine your technique.
Practice Launching in Different Weather Conditions
Now that you’ve learned how to adjust your launch angle, let’s move on to the next important step in launching a model glider: practicing in different weather conditions. This is a crucial aspect of becoming a skilled glider pilot, as it allows you to understand how varying wind speeds and directions can affect your launch.
By practicing in different weather conditions, you can develop a better sense of timing and control during launches.
Before each launch, it is important to conduct thorough pre-flight checks. This includes checking the wing alignment, control surface movement, and ensuring that all connections are secure. Neglecting these checks can lead to common mistakes during glider launches, such as unstable flights, loss of control, or even crashes.
Now that you understand the importance of pre-flight checks and the common mistakes to avoid, let’s move on to the next section: fine-tuning your glider’s balance and trim.
Fine-Tune Your Glider’s Balance and Trim
To fine-tune your glider’s balance and trim, make sure to adjust the weight distribution and control surfaces accordingly. Achieving the correct weight distribution is crucial for optimal flight performance.
Start by ensuring that the center of gravity (CG) is located at the recommended position. This can be achieved by adding or removing weight from the nose or tail of the glider.
Additionally, wing adjustments play a significant role in achieving proper balance. You can adjust the incidence angle of the wings, which affects the lift and drag forces. Make small adjustments and observe how they impact the glider’s flight characteristics. Remember that even minor changes can have a significant impact on the glider’s performance.
Learn to Read the Wind
Reading the wind is essential for understanding the current atmospheric conditions and how they will affect your glider’s flight. Wind patterns play a crucial role in determining glider performance. By observing wind direction and speed, you can make informed decisions about when and how to launch your glider.
The impact of wind direction on launch efficiency cannot be overstated. A headwind, for example, can provide the necessary lift for a smooth takeoff, while a tailwind can make launching more challenging. Understanding wind patterns and their effect on glider performance allows you to adjust your launch technique accordingly.
Experimenting with different launch techniques will further enhance your understanding of how the wind influences your glider’s flight. This knowledge will ultimately help you achieve optimal launch efficiency.
Experiment with Different Launch Techniques
Experimenting with various techniques can improve your understanding of how different launch methods can be affected by wind patterns. One important factor to consider is the optimal launch speed. By adjusting the speed at which you launch the glider, you can optimize its performance in different wind conditions.
It’s also crucial to recognize the effect of launch height on glider performance. Higher launch heights can provide more time for the glider to gain altitude and catch thermals, resulting in longer flight times. On the other hand, launching at lower heights may be beneficial in windy conditions, as it reduces the exposure to strong gusts.
Understanding these factors and experimenting with different launch techniques will help you achieve better results when flying your model glider. So, have fun and enjoy the flight!
Have Fun and Enjoy the Flight!
Enjoy the flight and have a blast while soaring through the sky! As a pilot, it’s important to not only experience the thrill of gliding but also understand the underlying principles of glider aerodynamics. Here are three key points to keep in mind while enjoying your flight:
-
Weight Distribution: Ensure that your glider is balanced and the center of gravity is in the correct position. This will help maintain stability and improve control during flight.
-
Airfoil Design: Familiarize yourself with the shape and characteristics of the glider’s airfoil. Understanding how it generates lift and reduces drag will enhance your flying experience.
-
Launch Techniques: Troubleshooting common launch problems is essential for a successful flight. Pay attention to your launching speed, angle, and technique to maximize the glider’s performance.
By learning glider aerodynamics and troubleshooting launch problems, you can fully enjoy the flight and make the most of your time in the sky.
Soar high and savor the exhilarating experience of gliding!
Frequently Asked Questions
How can I improve the distance my model glider travels?
To improve the distance my model glider travels, I can employ techniques for maximizing lift such as adjusting wing shape and angle of attack. Additionally, factors affecting glider performance include weight distribution, airfoil design, and wind conditions.
What are some common mistakes to avoid when launching a model glider?
Common mistakes when launching a model glider include improper grip, weak throws, and insufficient speed. To optimize launching technique, ensure a firm grip, use a powerful throw, and generate enough velocity for a successful flight.
Are there any specific safety precautions I should take when launching a model glider?
When launching a model glider, it is important to prioritize safety. Essential safety equipment includes goggles, gloves, and a helmet. Effective launching techniques involve a smooth underhand toss or using a bungee launch system.
What are some tips for adjusting the balance and trim of my glider to optimize its flight?
To optimize the flight of my glider, I adjust the weight distribution and wing angle. By carefully shifting the balance and fine-tuning the trim, I can achieve a smooth and stable flight.
How can I troubleshoot common issues that may arise during the launching process?
To troubleshoot common issues during the launching process, I employ various techniques and strategies. I carefully inspect the launch mechanism for any malfunctions, adjust the angle of the glider, and ensure proper release timing for optimal flight performance.
Conclusion
In conclusion, launching a model glider requires careful preparation and skillful execution. By gathering the necessary equipment, finding the perfect launch location, and preparing the glider for flight, you are setting yourself up for success.
Mastering your throwing technique, adjusting the launch angle, and fine-tuning the glider’s balance and trim will ensure a smooth flight. It is important to learn to read the wind and experiment with different launch techniques to maximize the glider’s performance.
Above all, remember to have fun and enjoy the flight, as you witness the graceful and precise movements of your model glider through the sky.