
TL;DR
Compact portable camping stoves let you cook meals outdoors while taking up little room, but their weight, stability, fuel, and performance vary. Match the stove to your group, menu, weather, and fuel access, then use it outdoors on stable ground according to its instructions and local fire rules.
A stove the size of your fist can boil water fast, yet feel shaky under a pot of pasta. Compact portable camping stoves come in a wide range of designs, and the smallest one isn’t automatically the best fit for your trip.

Get travel and outdoor gear delivered free with Prime
- Fast, free delivery on millions of items
- Prime Video, Amazon Music and more included
- Member-only deals all year
This guide explains how canister, liquid-fuel, alcohol, solid-fuel, and wood-burning stoves differ, what to compare beyond the number on the scale, and how wind and cold affect cooking. You’ll also get a practical way to match a stove to your meals and a reminder of the safety rules that matter at camp.
Fuel availability and fire restrictions vary by place, and products change over time. Check current manufacturer instructions, local fire rules, and travel requirements before you buy or set out.
Compare packed stove, fuel, and cookware weight together; burner-only numbers can mislead.
Choose canister or integrated systems for many quick-boil needs, and check simmer control if you plan to cook meals in a pot.
Confirm fuel compatibility and local availability, especially before remote, international, or cold-weather trips.
Never enclose a canister stove in a windscreen unless the manufacturer designed that setup.
Cook outdoors on stable ground, away from shelters and flammable materials, and check local fire rules.
Choose a stove type that fits your meals and trip
Compact portable camping stoves use different fuels and designs, so the right choice depends on what cooking asks of the stove. Boiling water is a short burst of high heat; simmering rice or sauce needs steady low heat, and cooking for a group calls for enough pot capacity and a stable base. Those demands affect both meal quality and fuel use, so start with the menu rather than the burner’s smallest listed weight.
Canister stoves connect to pressurized gas, often an isobutane and propane blend. Their quick setup and straightforward operation make them convenient for backpacking. The tradeoff is that fuel is in a specific canister format, and cold can reduce pressure and output. Integrated systems pair a burner with a pot or heat exchanger. Their close-fitting design can transfer heat efficiently for boiling, potentially reducing fuel carried on a water-focused trip, but the matched pot and narrow supports may be less useful for frying, simmering, or cooking larger meals.
Liquid-fuel stoves use a refillable bottle and can suit longer trips or cold conditions. They may offer adaptable fuel access and reliable performance in cold weather, but priming, cleaning, and maintenance take more time and attention. Alcohol and solid-fuel stoves are simple and compact, though slower heating and limited flame adjustment can make timing meals less predictable. Wood-burning stoves avoid carrying dedicated fuel when suitable dry twigs are available, but gathering fuel takes time and may be prohibited by fire rules or impossible in wet, exposed terrain.
Imagine making coffee on a brisk morning, then cooking rice for three at dusk. A quick-boil system may make coffee fast, but its small pot and limited simmer control can turn the shared dinner into several rounds of cooking. A stove with broader supports and better flame control may add weight while saving time and making the meal easier to manage. Think through your real menu and how you’ll cook it before choosing a burner.
- Mostly boiling: consider a canister or integrated system, and compare total fuel and pot weight for your trip length.
- More flexible cooking: look for stable supports and low-heat control; these matter when a meal needs sustained simmering.
- Remote or cold trips: check fuel access and the maker’s cold-weather guidance, since a stove that is easy to light at home may perform differently in the field.
Products Worth Considering

GoPro Fluid Pro AI 3-Axis Gimbal Stabilizer with AI Tracking and Fill Light

Bose QuietComfort Wireless Noise Cancelling Headphones – Twilight Blue Limited Edition

Amazon Kindle Paperwhite (16 GB, 2024) – 7-inch Display, Black
As an affiliate, we earn on qualifying purchases.
Compare the whole cooking kit, not just the burner
To compare compact portable camping stoves fairly, weigh and measure the stove, fuel, and cookware together. Burner-only weight leaves out the items that make the stove usable, and can make a setup look lighter than it is in your pack. Fuel also changes the comparison over a trip: a highly efficient system may start heavier because of its pot, yet need fewer fuel canisters or less fuel overall for repeated boils.
For example, if you’re hiking alone for one night and only boiling a couple of cups of water, a simple burner and small pot may suit you. The extra pot built into an integrated system could be weight and bulk you don’t need. On a three-day trip with two friends, the same small setup could mean several rounds of cooking, more fuel handling, and longer waits. A larger pot or broader support adds carried weight, but may let you prepare a shared meal in one batch and reduce the risk of a tall or crowded pot tipping.
| Stove style | Often suits | Tradeoff to check |
|---|---|---|
| Canister burner | Light, quick meals | Fuel access and wind exposure |
| Integrated system | Boiling water efficiently | Cookware choice and simmering |
| Liquid fuel | Longer or cold trips | Setup and maintenance |
| Alcohol or solid fuel | Simple, compact kits | Speed and heat control |
| Wood-burning | Trips with suitable natural fuel | Dry fuel and fire restrictions |
Use the table to narrow the options, then compare packed dimensions, fuel compatibility, and the amount of cookware your planned meals require. Consider how many times you’ll cook: a small kit can be ideal for one quick meal, while a slightly heavier setup may be more comfortable if it avoids repeated boiling or awkward pot handling. The best kit is the one whose total load and cooking limits fit the meals you actually plan to make.
Check fuel access and weather before you commit
A compact stove is only useful if you can bring compatible fuel and it performs in the conditions you’ll face. Fuel availability, temperature, wind, and altitude affect reliability and how much fuel a meal takes. Canister fuel is convenient in many outdoor shops, but some canister types aren’t interchangeable. If you can’t replace the right type on a remote or international trip, a light stove offers little benefit once its fuel runs out.
Cold can reduce output from pressurized canister stoves, especially as the canister empties. That can mean slower boils and more time spent cooking, so a fuel estimate based on mild weather may fall short. Some models allow an inverted canister for liquid feed, but only if the stove was designed for it and its instructions permit it. Liquid-fuel models are often chosen for very cold trips; their more involved setup and upkeep are the cost of that suitability.
Wind can lengthen boil times and use more fuel by carrying heat away from the pot. A windscreen may help with some stoves, but enclosing a canister stove can trap heat and overheat the canister. Never use a windscreen around a canister unless the stove maker specifically designed the setup for it. This is a safety constraint, not just a performance preference; follow the stove’s guidance even when wind makes cooking frustrating.
Say you plan a windy shoulder-season hike and expect to make hot drinks at breakfast. Check the temperature guidance, fuel type, and wind instructions before leaving home. Test the complete setup at a safe outdoor location so you can see how it lights, supports your pot, and performs in conditions similar to the trip. Carry a reserve based on the maker’s consumption guidance; your actual use will vary with weather, cookware, and meals, and a reserve gives you room for slower cooking or an unexpected extra hot drink.
Before booking or traveling: verify local fuel availability, fire rules, and any transport requirements with official sources and the relevant carrier.
Use these five checks to find your best fit
Choose a compact stove by matching it to your group, meals, conditions, and carrying plan. Five checks—weight, fuel, weather, stability, and maintenance—show how well a model will work in practice, where a feature list alone can hide compromises. A stove may be light but inconvenient for a group, or powerful but hard to control for a meal that needs a simmer.
- Count your cooks. A solo burner can be awkward for a group meal; estimate how many people will share each pot. More people often means a larger pot and more fuel, so account for the whole setup rather than assuming one small burner will serve everyone equally well.
- Write down your menu. If you mostly boil water, an integrated pot may work well. If you cook beans or sauce, check that the burner can simmer. A stove that only excels at fast boiling may burn food or require extra attention when used for longer, gentler cooking.
- Compare packed weight and size. Include fuel and cookware, not just the burner. The right comparison depends on trip length: a system that starts heavier can still be practical if it uses fuel efficiently, while a simple burner may win when you need only a few boils.
- Check the route and season. Confirm fuel compatibility, expected conditions, and local fire rules. This determines whether you can obtain fuel and use the stove where you plan to camp, as well as whether the model is suited to cold or windy conditions.
- Read care and setup instructions. Check seals, connections, hoses, and burner parts as the maker directs. A stove that needs regular maintenance may be dependable when cared for, but it asks for time and familiarity that a simpler setup may not.
For instance, a couple cooking oatmeal and a one-pot dinner could prioritize a stable support and a pot that holds enough for two. That may mean carrying more weight than a tiny solo system, but it makes stirring and serving easier and reduces the chance of crowding the pot. A solo traveler eating dehydrated meals may put more weight on compact packing and simple setup. Neither needs the same stove just because both want to cook meals outdoors.
Recent models may offer lighter materials, improved supports, remote-canister layouts, pressure regulation, or integrated pots that reduce wind exposure. These features address specific compromises: a remote canister can separate the burner from the fuel, while integrated pots can improve heat transfer, but each model still has limits in cookware choice, packing bulk, or cold-weather performance. Confirm current specifications and test the stove with your own cookware before a long trip, so you know how the features work with the meals and conditions you expect.
Set up your stove safely at camp
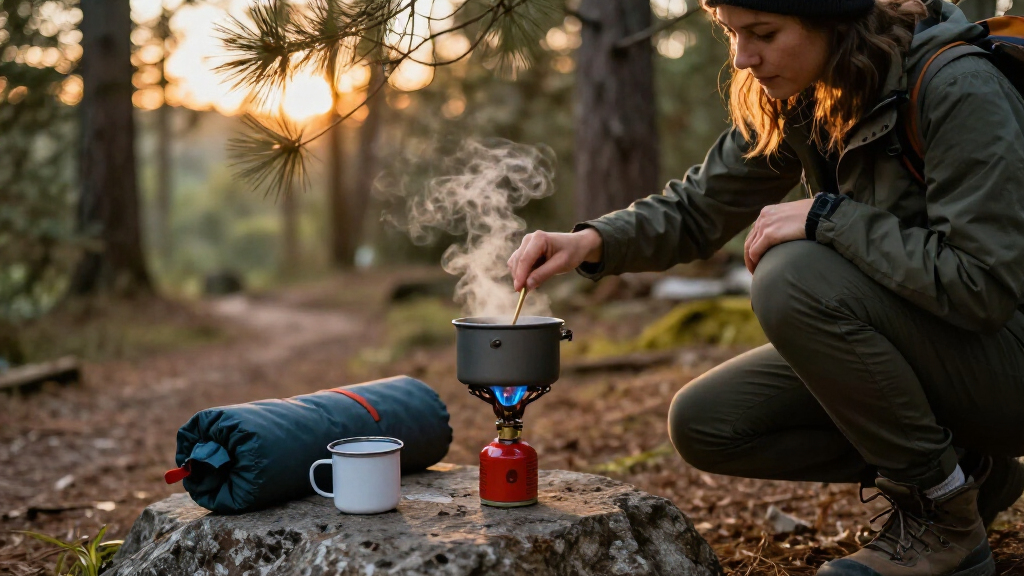
Use a camping stove outdoors in a well-ventilated area, on stable, level ground and away from tents, dry grass, and other flammable materials. Never run it inside a tent, vehicle, or enclosed shelter: fire and carbon monoxide can cause serious harm, and carbon monoxide can build up without warning.
Before lighting, follow the maker’s directions for connecting fuel and checking for leaks. Keep fuel away from heat, steady the cooking surface, and avoid balancing a large pot on a small burner. If a campsite is sloped, find firm level ground before you start cooking rather than trying to steady the pot with your hand.
Let the stove and cookware cool before packing them. Store and transport fuel according to the instructions and applicable rules. Fire bans and stove restrictions vary between parks and regions; a gas stove may be permitted in one place and restricted in another, so check with the land manager or local authority.
If children are at camp, keep them away from the flame, hot cookware, and fuel, and supervise them closely. At a busy family campsite, choose a cooking spot where people won’t brush past the stove. Follow the product instructions and local rules every time, even if you’ve used a similar model before.
Frequently Asked Questions
Which compact camping stove works well for backpacking?
For many solo backpackers, a basic canister stove balances low weight, speed, and simple setup. If you mostly boil water, an integrated system may suit you; compare the full packed kit and check fuel access for your route.
Can I use a camping stove inside a tent?
No. A stove can start a fire and produce carbon monoxide inside a tent or other enclosed space. Cook outdoors in a well-ventilated area, away from the shelter and flammable materials.
Can compact camping stoves work in cold weather?
Some can, but performance varies by stove, fuel, and temperature. Check the manufacturer’s cold-weather instructions; only use an inverted canister if the stove is designed for it, and never heat a canister directly.
How much fuel should I bring?
Fuel use depends on the stove, weather, altitude, cookware, and meals. Start with the manufacturer’s consumption guidance, allow a reserve, and test your kit outdoors before a longer trip.
Are camping stoves allowed during a fire ban?
Rules vary by location, stove type, and current conditions. Check with the park, land manager, or local authority before traveling rather than assuming a stove is permitted.
Conclusion
Pick your stove from the trip outward: start with your meals and group, then check packed weight, fuel, weather performance, stability, and care. Test the full kit before you leave, and verify local rules and current instructions.
A good camp stove earns its place when dinner simmers steadily and the pack still closes. Choose the setup that makes that quiet moment possible.