
To pack an effective field-repair kit, choose durable, impact-resistant containers that seal tightly against moisture and dirt. Include versatile, multi-use tools like pliers, screwdrivers, and knives, along with essential supplies such as spare parts, adhesives, and lubricants. Organize items using labeled compartments for quick access and keep your kit lightweight by focusing on essentials. Regularly check and restock your supplies to guarantee everything works smoothly when needed. Continue for tips to customize and maintain your kit better.
Key Takeaways
- Select durable, weatherproof containers with compartments to organize tools, supplies, and spare parts for quick access.
- Prioritize versatile, multi-purpose tools like pliers, screwdrivers, and knives to maximize functionality in a compact kit.
- Include essential consumables such as duct tape, adhesives, lubricants, batteries, and first aid supplies tailored to your activities.
- Regularly check and maintain the kit, replacing worn tools and replenishing supplies to ensure readiness.
- Customize contents based on specific activities and environmental challenges for targeted, effective field repairs.
Identifying Essential Tools and Supplies
To effectively prepare a field-repair kit, you need to identify the essential tools and supplies that will cover common repairs. Start with tool identification—focus on versatile tools like pliers, screwdrivers, and a wrench, which handle most tasks. Next, prioritize supplies based on frequency and importance; include items such as duct tape, spare parts, and adhesive. Consider the types of equipment you’ll be repairing most often, and tailor your selection accordingly. Keep in mind that unnecessary items can weigh down your kit, so stay focused on essentials. Additionally, understanding the bedroom environment can help determine specific tools needed for delicate or larger repairs. By honing your tool identification skills and supply prioritization, you’ll ensure your kit is well-equipped, organized, and ready for quick, effective repairs in the field.
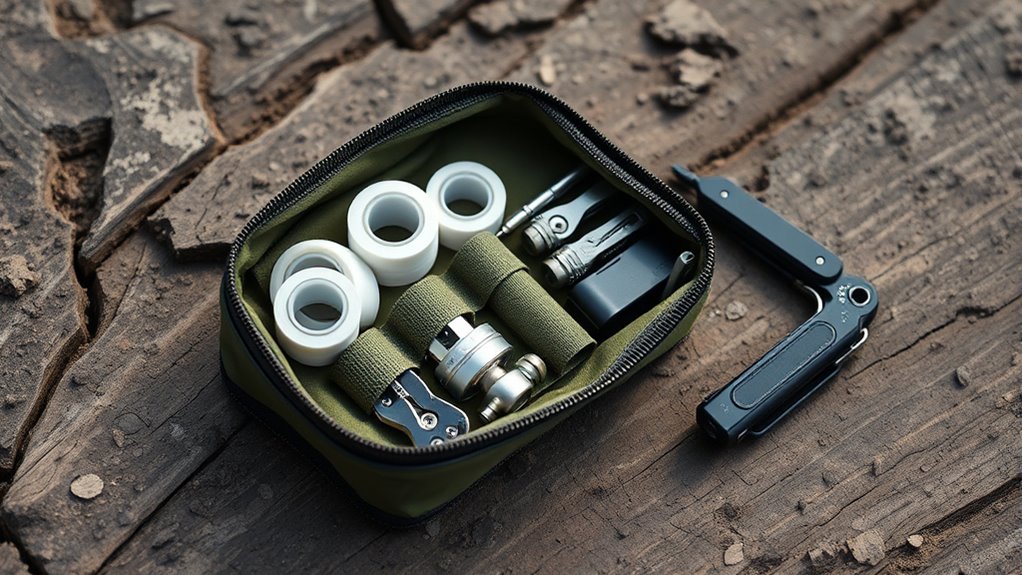
Choosing the Right Container for Your Kit
After identifying the tools and supplies for your field-repair kit, selecting the right container is the next step to guarantee everything stays organized and protected. Focus on material selection and container durability. You need a container that withstands rough conditions, impacts, and moisture. Durable plastics, aluminum, or hard cases are excellent options. Consider how well the container seals to keep out dirt and water. Your choice should balance weight with strength, so it’s portable yet sturdy enough to protect your tools. Additionally, evaluating the contrast ratio of the container’s surface can help determine its ability to resist glare and maintain visibility in various lighting conditions.
Organizing Items for Accessibility and Efficiency
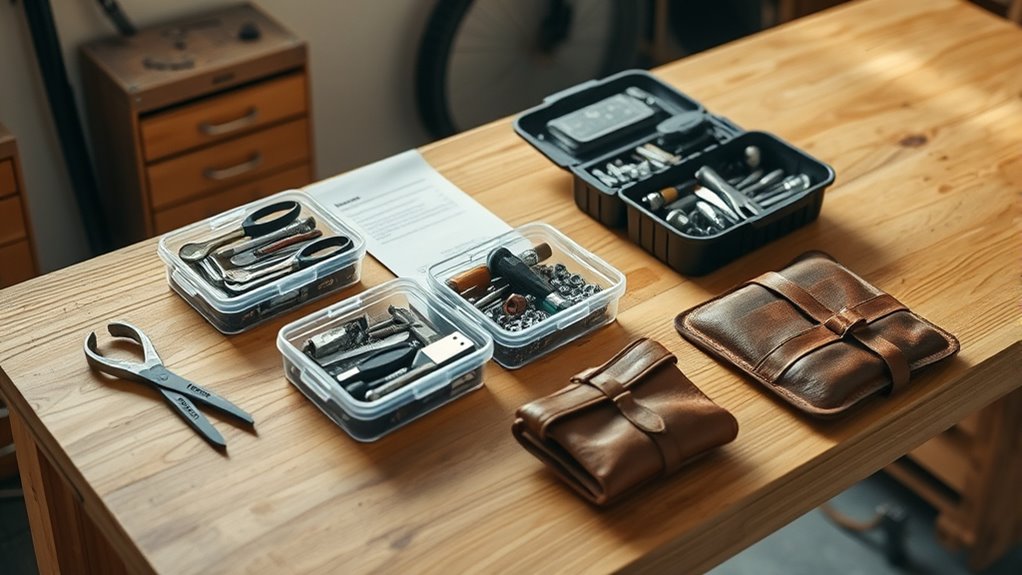
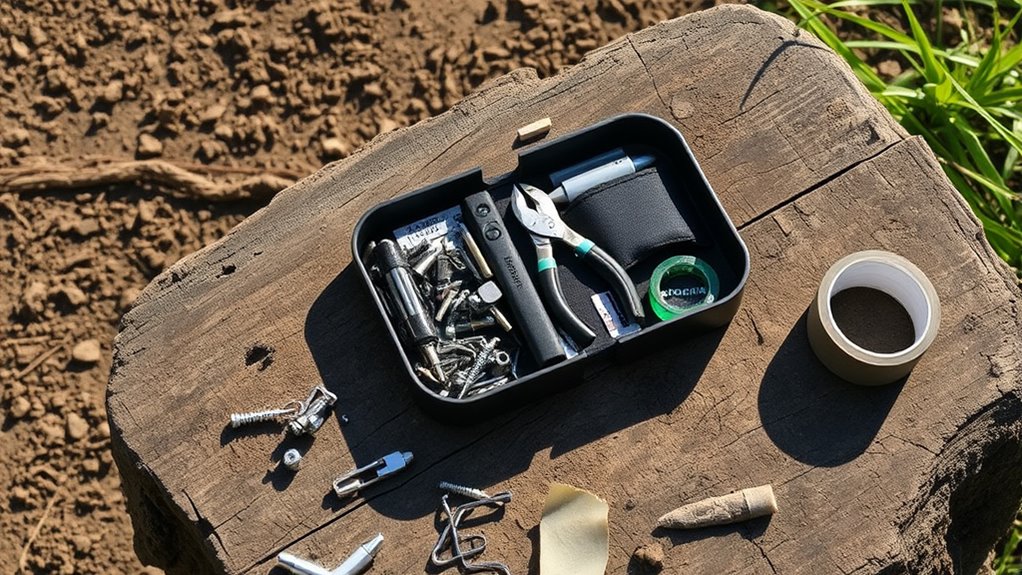
Organizing your tools and supplies for quick access can make all the difference in a field repair situation. Use smart storage solutions like compartmentalized containers, hanging pouches, or small boxes to keep items separated and visible. Implement a labeling system on each container or section to instantly identify contents, reducing search time. To improve efficiency, consider these steps:
- Group similar items together, such as fasteners, tools, and consumables.
- Label each section clearly with waterproof tags or stickers.
- Arrange items by frequency of use, keeping essentials at the top or front.
- Incorporate dedicated Pimple Patch compartments for targeted skin treatments when necessary.
This organization allows you to locate what you need swiftly, minimizes frustration, and maximizes your repair effectiveness in the field. Proper storage solutions and labeling are key to a well-functioning, accessible kit.
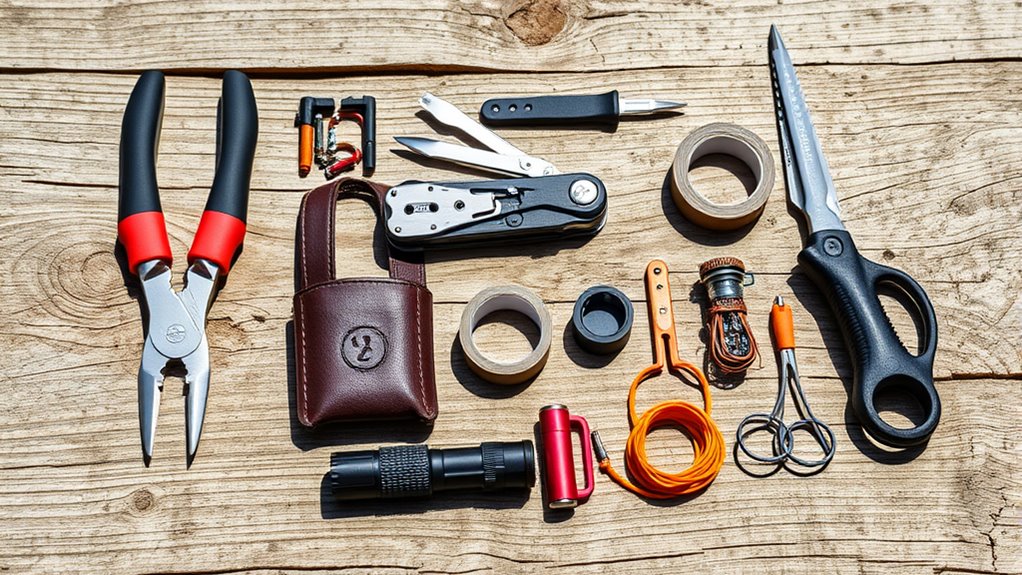
Selecting Multipurpose Tools to Save Space
Choosing versatile tools can help you pack smarter and save space in your kit. This way, you’ll have everything you need without taking up unnecessary room. Incorporate multi-functionality into your tools to maximize efficiency and convenience.
Versatile Tool Options
Opting for multipurpose tools can substantially reduce the space needed in your field-repair kit while increasing its versatility. When choosing tools with high multi tool versatility, focus on those offering multiple functions in one device. Imagine a single tool that:
- Combines pliers, wire cutters, and a screwdriver head
- Includes a knife, bottle opener, and file
- Features a saw blade that folds into the handle
Such tools maximize tool multipurpose functionality, allowing you to tackle various tasks without cluttering your kit. This approach saves space and ensures you’re prepared for different repair scenarios. Prioritize compact, well-designed tools that deliver multiple functions seamlessly. With versatile options, your kit becomes more efficient and easier to carry, making sure you’re ready for anything in the field. Additionally, selecting tools with durable and corrosion-resistant materials ensures longevity and reliable performance during demanding repairs.
Compact Multi-Tool Design
Selecting a multi-tool with a compact design helps you maximize space in your field-repair kit while guaranteeing you’re prepared for a variety of tasks. Focus on multi-tool ergonomics to ensure comfortable handling during prolonged use, which improves efficiency and reduces fatigue. When choosing, prioritize tools that follow compact design principles, meaning they combine multiple functions into a small, lightweight package without sacrificing performance. Look for tools with foldable components and streamlined arrangements that prevent bulk. This way, you keep your kit lightweight and organized, making it easier to access what you need quickly. A well-designed compact multi-tool offers versatility without crowding your pack, ensuring you’re ready for surprises without weighing you down. Incorporating family background knowledge can also help you select tools that are durable and suited to your specific needs.
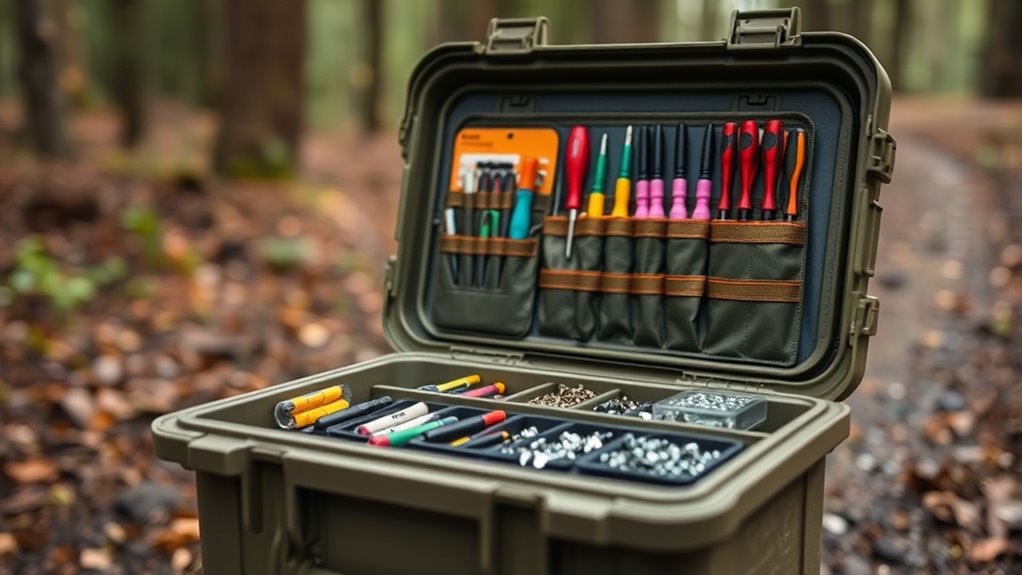
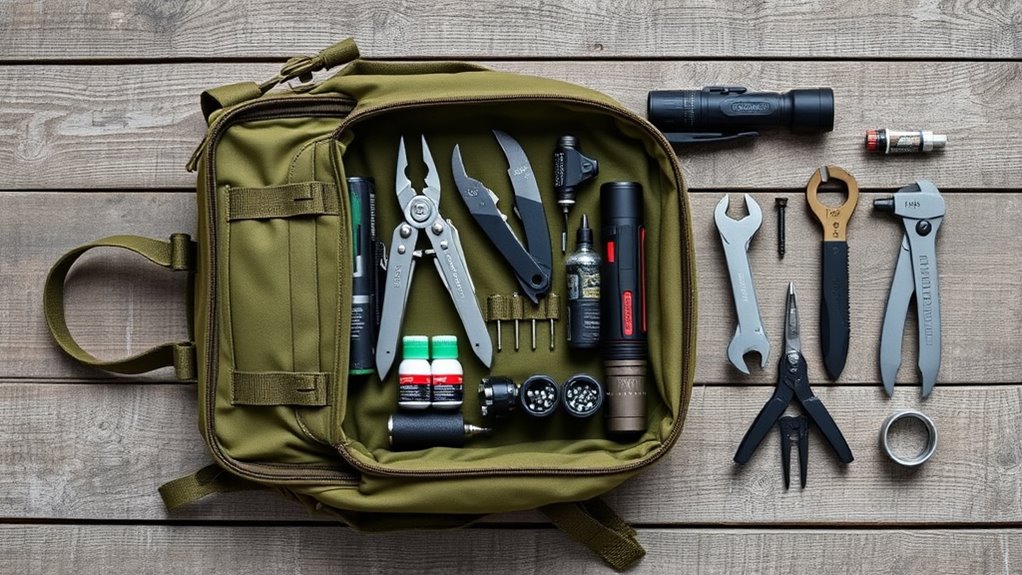
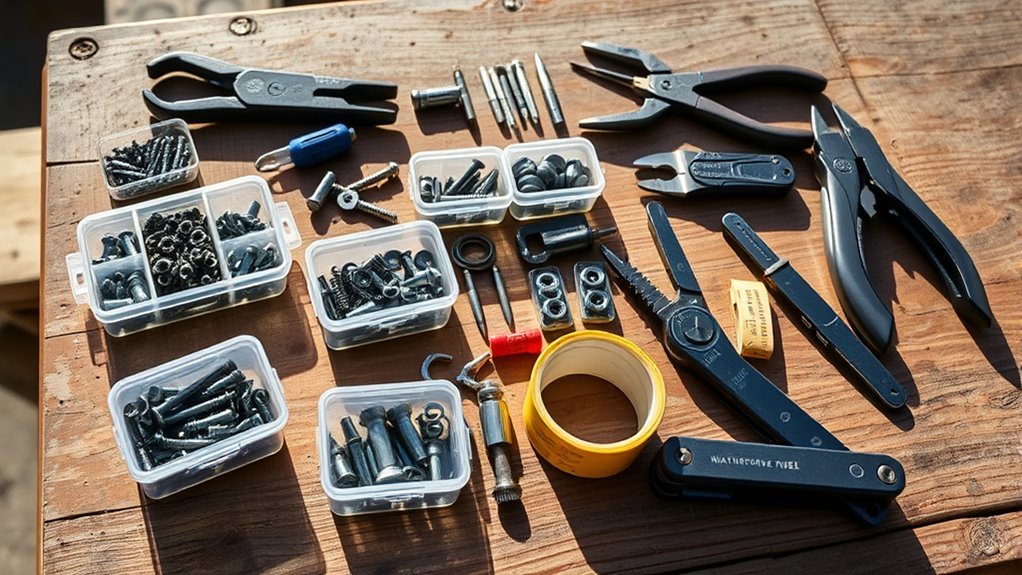
Including Spare Parts and Consumables
You need to choose spare parts that match your equipment and are easy to replace in the field. Make a list of essential consumables like lubricants, adhesives, and cleaning supplies to keep your repairs moving smoothly. Properly selecting and packing these items guarantees you’re prepared for most common issues. Additionally, familiarize yourself with installation guidelines to ensure your repairs comply with safety standards and manufacturer recommendations.
Spare Parts Selection
Choosing the right spare parts and consumables is vital for ensuring your field-repair kit is prepared for any situation. Focus on selecting versatile, high-quality items that match your equipment’s needs. Imagine these key elements:
- Battery types—include rechargeable and alkaline options, labeled clearly for quick access.
- Small mechanical parts—such as screws, washers, and connectors, organized in labeled compartments.
- Tools and adapters—like pliers, screwdrivers, and universal connectors, kept in a designated section for easy retrieval.
- Incorporating textile art techniques into your organization can help you create custom storage solutions that suit your specific needs.
Proper label and organization are essential; they help you quickly identify and access the right spare parts under pressure. By carefully choosing and categorizing your spare parts, you ensure your kit remains efficient and reliable during field repairs.
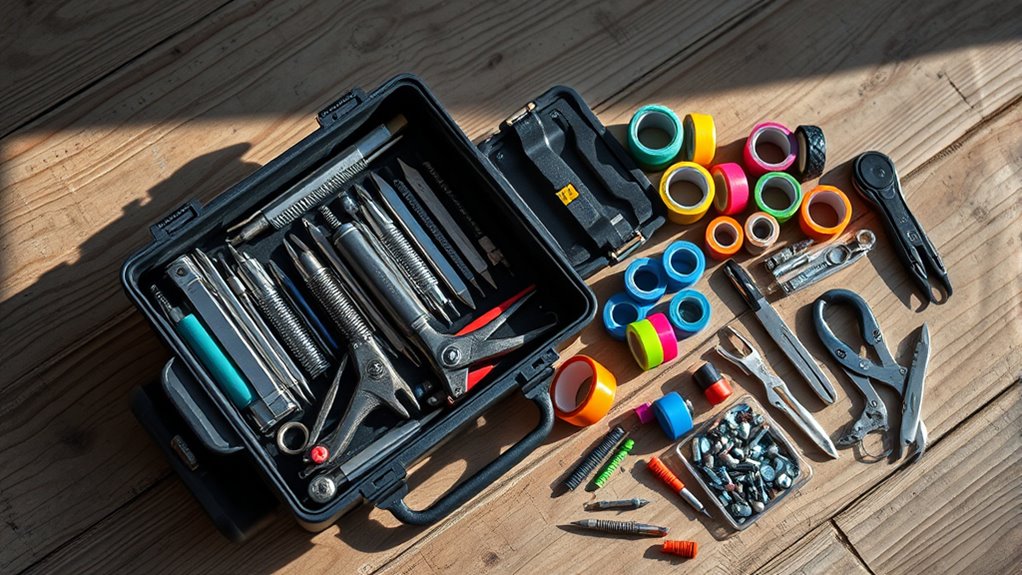
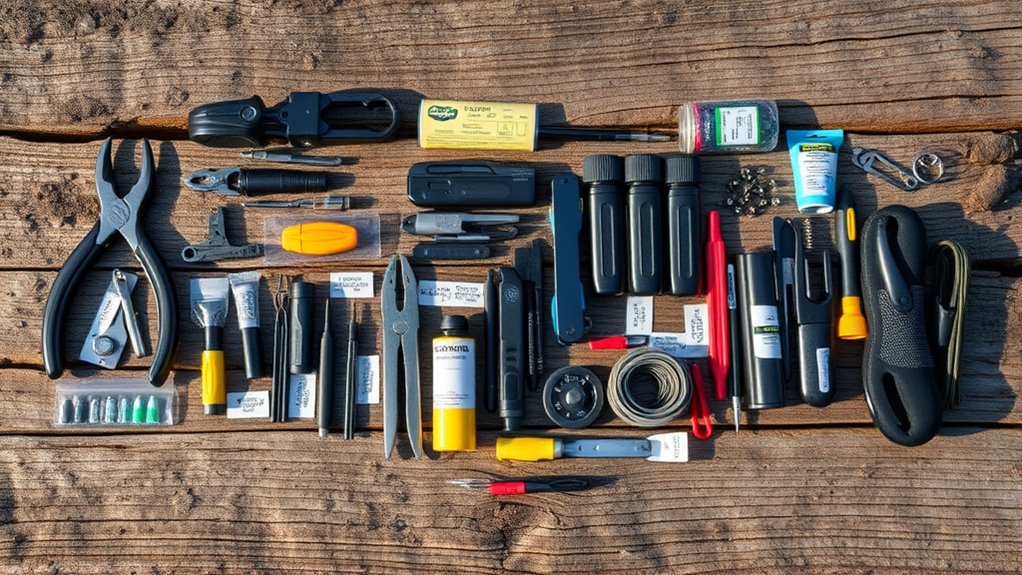
Essential Consumables List
A well-organized field-repair kit depends on an exhaustive list of consumables and spare parts that can handle a variety of repair scenarios. Include first aid essentials like bandages, antiseptic wipes, and pain relievers to address injuries quickly. Safety gear such as gloves, eye protection, and masks is crucial to protect yourself during repairs. Pack versatile consumables like adhesive tapes, zip ties, and lubricants to fix equipment on the spot. Spare parts like replacement screws, fuses, and small electronic components ensure you’re prepared for common failures. Regularly check and replenish these items to keep your kit ready. Prioritize items that are lightweight, durable, and multipurpose, so your kit remains compact without sacrificing effectiveness. Additionally, staying informed about AI’s role in healthcare can help you prepare for emerging technological tools that might assist in field repairs.
Packing for Durability and Weather Resistance
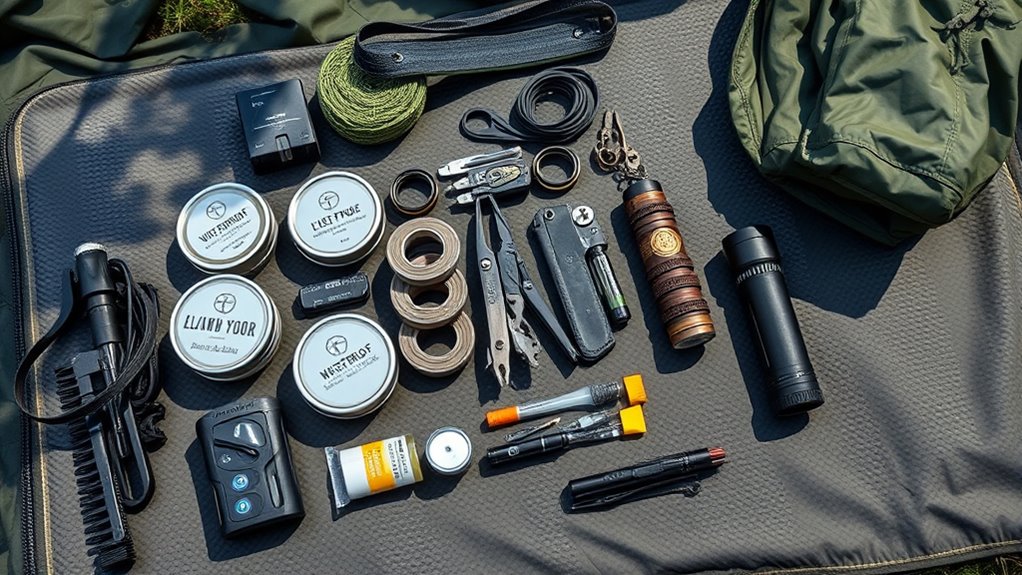
To guarantee your field-repair kit withstands harsh conditions, focus on selecting durable containers and weather-resistant materials. Use waterproofing techniques like sealed plastic cases, corrosion-resistant metal boxes, or rugged, sealed zippered pouches for weatherproof storage. Visualize your kit protected by:
Ensure your repair kit stays dry and functional with waterproof containers and weather-resistant materials.
- A sturdy, waterproof toolbox with reinforced corners
- Sealed compartments that keep moisture out
- Weather-resistant zippers, seals, or closures
These choices prevent water, dirt, and dust from damaging your tools and supplies. Opt for high-quality materials that resist tearing and corrosion. Ensuring your storage options are weatherproof is essential for maintaining the integrity of your tools in extreme conditions. By prioritizing weatherproof storage, you ensure your repair kit remains operational in rain, mud, or extreme conditions, so your tools stay dry and ready when you need them most.
Keeping Your Kit Lightweight and Compact
Ensuring your repair kit is lightweight and compact makes it easier to carry and access in the field. Focus on essentials like first aid supplies and navigation tools, removing anything unnecessary. Choose multi-purpose items, such as a Swiss Army knife, to save space. Use small, durable containers to organize components and prevent bulk. Opt for lightweight materials without sacrificing quality. Consider compact first aid kits that combine bandages, antiseptics, and pain relievers into one package. For navigation, use foldable maps or digital apps on a small device instead of bulky gear. Regularly review and streamline your kit, keeping only what’s crucial. This way, your repair kit remains manageable, quick to access, and ready for any situation without weighing you down.
Regular Maintenance and Restocking
Regular maintenance and restocking are essential to keep your field-repair kit ready for any situation. Without proper tool maintenance, tools can become dull or damaged, reducing their effectiveness. To stay prepared, you should:
- Check all tools for wear or damage, sharpening or replacing as needed.
- Review your inventory, ensuring essential items like screws, tape, and batteries are stocked and not expired.
- Clean and organize your kit, removing clutter and ensuring everything is in its designated place.
This process helps you identify missing or faulty items, preventing surprises during repairs. Regularly managing your inventory and maintaining your tools keeps your kit functional, reliable, and ready to tackle any repair challenge. Consistent upkeep saves time and guarantees you’re always prepared.
Customizing Your Kit for Specific Activities
Tailoring your field-repair kit for specific activities guarantees you’re prepared for the unique challenges each situation may present. Start by customizing tools that suit your activity—whether it’s hiking, camping, or biking—so you have exactly what you need. Incorporate activity-specific supplies, like extra batteries for your headlamp or specialized fasteners for gear repairs. Consider the environment and common issues you might face, then add relevant items. For example, if you’re mountain biking, include tube patches and tire levers; for backpacking, pack lightweight, multi-purpose tools. Regularly review and adjust your kit based on your activities, ensuring it remains relevant and efficient. Customizing tools and supplies minimizes waste and maximizes readiness, so you’re prepared for whatever challenges your adventure throws your way.
Frequently Asked Questions
How Do I Determine the Appropriate Size for My Field-Repair Kit?
When figuring out the appropriate size for your field-repair kit, start with a size assessment of your needs. Think about the type of equipment you’ll be repairing and the common issues you might face. Next, focus on tool selection—choose versatile, essential tools that cover multiple functions without overloading your kit. Keep it compact yet complete, ensuring you can carry it easily while having everything you need for quick fixes.
What Are Common Mistakes to Avoid When Assembling a Repair Kit?
When assembling your repair kit, avoid overpacking tools, which adds unnecessary weight and complicates quick access. Don’t ignore durability; choose sturdy, reliable items that won’t break easily under pressure. Keep your kit organized, so you don’t waste time searching for essentials. Remember, a well-thought-out kit with durable, necessary tools will serve you best in emergencies, rather than a bulky collection of less reliable, unnecessary items.
How Often Should I Review and Update My Repair Kit Contents?
You should review and update your repair kit regularly, ideally with a maintenance schedule every 3 to 6 months. Check your kit inventory for expired or worn-out items, and replace them promptly. This guarantees you’re always prepared with functional tools and supplies. Staying consistent with these reviews helps you avoid surprises in the field and keeps your kit reliable when you need it most.
Are There Specific Brand Recommendations for Durable Repair Tools?
When choosing repair tools, look for brand recommendations known for tool durability. Brands like Leatherman, Victorinox, and Bosch offer reliable, long-lasting options that stand up to tough conditions. You want tools that won’t break or wear out quickly when you need them most. Prioritize quality over cost, and stick to reputable brands to guarantee your repair kit remains effective and dependable in the field.
How Can I Personalize My Repair Kit for Different Weather Conditions?
You might think weather-specific tools aren’t necessary, but seasonal gear adjustments prove otherwise. To personalize your repair kit, include weather-specific tools like waterproof adhesives for rain, thermal tape for cold, and UV-resistant patches for sunny conditions. Investigate your typical climate, then tailor your kit accordingly. This way, you’re prepared for any situation, ensuring your gear stays functional no matter the weather.
Conclusion
A well-packed repair kit is your backup when things go wrong, turning chaos into calm. While it’s tempting to include every tool, simplicity keeps it lightweight and ready. Think of your kit as both a lifeline and a puzzle—every item has a purpose, yet too much can weigh you down. Balance thoroughness with portability, and you’ll have a reliable, efficient kit that’s ready for any field repair, no matter the challenge.