
Glide ratio measures how far an aircraft can travel forward for each unit of altitude it loses, and it’s calculated by dividing the horizontal distance by altitude lost. For example, a 10:1 ratio means you can go 10 miles for every mile of descent. Factors like wind, aircraft design, and aerodynamics influence this ratio. Keep exploring to see simple steps and examples to fully understand how to calculate and use glide ratio effectively.
Key Takeaways
- Glide ratio is the horizontal distance traveled divided by the altitude lost during a glide.
- Example: a 10:1 ratio means 10 miles forward for every 1 mile of altitude descent.
- Calculate by dividing horizontal distance by altitude lost; ensure consistent units (feet, meters).
- Higher glide ratios indicate more efficient aerodynamics, allowing longer travel per altitude.
- Wind effects (headwinds or tailwinds) can alter the effective glide distance and should be considered.
Top picks for "glide ratio explain"
Open Amazon search results for this keyword.
As an affiliate, we earn on qualifying purchases.
What Is Glide Ratio?
Have you ever wondered how far an aircraft can glide after losing power? The key lies in the glide ratio, which measures how efficiently a plane can travel forward relative to its descent. This efficiency depends heavily on aerodynamic efficiency and wing design. Well-designed wings with ideal shape and surface smoothness reduce drag and improve lift, allowing the aircraft to glide farther. The glide ratio is fundamentally the ratio of horizontal distance traveled to altitude lost; a higher ratio means a better glide. Understanding this balance helps pilots evaluate how far they can go without engine power. Additionally, aerodynamic efficiency plays a crucial role in maximizing glide performance. So, the better your aircraft’s wing design and aerodynamic efficiency, the farther you can glide after losing power, giving you more control and safety during emergencies.
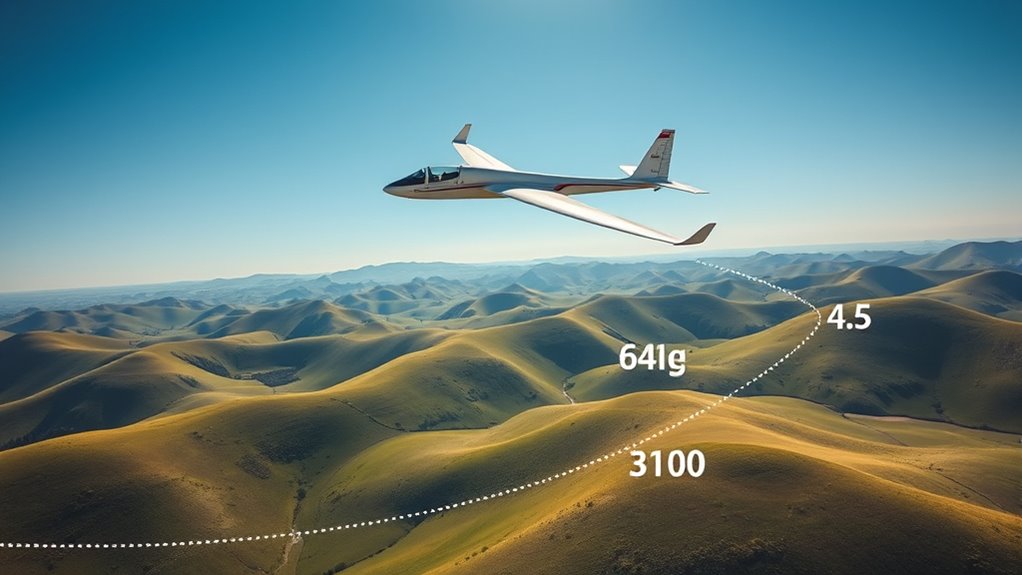
Visualizing Glide Path With a Simple Example
To better understand the glide path, consider a simple example: imagine an airplane at a certain altitude that loses engine power. As it begins to descend, its glide angle depends on aerodynamic efficiency and wing design. Visualize the aircraft’s path as a diagonal line across a chart:
| Height (meters) | Horizontal Distance (meters) |
|---|---|
| 1000 | 1500 |
| 500 | 750 |
| 0 | 0 |
This table shows how the glide ratio determines how far the plane travels horizontally for each unit of altitude lost. Better wing design and aerodynamic efficiency result in a shallower glide angle, allowing you to cover more distance with less altitude loss. Additionally, interior design considerations can influence how pilots manage glide paths during approach. This simple visualization clarifies how glide path depends on aircraft design.
The Basic Math Behind Glide Ratio
Ever wonder how glide ratio is calculated? It’s based on the airplane’s aerodynamic efficiency, which measures how well the aircraft converts energy into forward motion versus drag. The basic math involves dividing the distance traveled horizontally during a glide by the altitude lost. For example, a glide ratio of 10:1 means you cover 10 miles for every mile of altitude. Pilot techniques, like maintaining a steady airspeed and proper angle of descent, help optimize this ratio. Understanding these simple calculations reveals how aircraft efficiency affects glide performance. By focusing on aerodynamic efficiency and applying effective pilot techniques, you can maximize your glide distance, making emergency planning and flight management more predictable and safer. Additionally, AI security technologies can monitor aircraft systems in real time to detect anomalies and enhance safety during flight.
Calculating the Glide Ratio Step-by-Step

To calculate the glide ratio step-by-step, start by measuring the distance your aircraft covers during a glide. Next, determine your altitude loss over that same distance. Finally, apply the glide ratio formula by dividing the horizontal distance by the altitude lost to get your ratio. Understanding the jet propulsion system can help in comprehending how aircraft maintain efficiency during gliding.
Measuring Distance and Altitude
Have you ever wondered how pilots determine the glide ratio of an aircraft? To start, you need to measure the distance traveled during a glide, often using landmarks or instruments. Next, you record the altitude lost, which depends on the initial altitude and air density. A wider wing span can influence the aircraft’s glide performance, but for measurement purposes, focus on accurate readings. To get precise results, you can use a GPS device or ground-based markers. Keep in mind that air density affects lift and glide distance; higher density improves performance. Additionally, understanding the Basics of Soaring and Gliding can help you interpret your measurements better. By carefully measuring both the horizontal distance and the altitude lost, you can calculate the glide ratio more accurately. This step-by-step process is essential for understanding how well your aircraft can glide in different conditions.
Applying the Glide Ratio Formula
Calculating the glide ratio involves applying a simple formula: divide the horizontal distance traveled during a glide by the altitude lost. To do this accurately, consider the lift coefficient and wing loading, which influence your aircraft’s efficiency. Higher lift coefficients improve lift, while ideal wing loading balances weight and wing area for better glide performance. Use this table to understand how adjustments impact glide:
| Adjustment | Effect on Glide Ratio |
|---|---|
| Increase lift coefficient | Improves glide distance |
| Decrease wing loading | Enhances glide efficiency |
| Reduce altitude loss | Boosts overall glide performance |
| Optimize wing design | Achieves better lift-to-drag ratio |
Applying these principles helps you refine your glide, ensuring a safer and more efficient flight. Understanding these factors can further optimize your glide performance.
How Wind Affects Glide Distance

Wind can markedly influence your glide distance, either helping you travel farther or cutting your flight short. Headwinds push against your wing, increasing aerodynamic drag and reducing your glide efficiency. This means you’ll cover less ground for the same altitude loss. Conversely, tailwinds boost your glide distance by pushing you forward, decreasing drag and allowing you to travel farther. Wind’s impact also interacts with your wing design; some wings are more sensitive to wind conditions because of their shape and surface area. Crosswinds can cause your glider to drift off course, making precise navigation more challenging. Understanding how wind affects your glide helps you plan better, optimize your route, and make the most of your flight, regardless of wind conditions. Additionally, the high-performance technology in modern wings can influence how effectively they respond to varying wind conditions.
Comparing Different Gliders Using Glide Ratios

When comparing gliders, you’ll notice that higher glide ratios mean longer potential distances and better efficiency in flight. Different models excel in various conditions, impacting how far and smoothly they can travel. Understanding these differences helps you choose the right glider for your flying goals. For enthusiasts interested in performance, tuning options can further optimize how a glider performs under specific conditions.
Glide Distance Potential
Have you ever wondered how different gliders compare in their ability to cover distance? Glide distance potential depends on glide ratio and wind conditions, but aerodynamic efficiency and wing design play key roles. A glider with a higher glide ratio can travel farther before losing altitude. For example, a glider with a 50:1 ratio covers much more ground than one with 30:1. The table below illustrates this:
| Glide Ratio | Distance Potential (per 1 km altitude loss) |
|---|---|
| 30:1 | 30 km |
| 40:1 | 40 km |
| 50:1 | 50 km |
A superior wing design improves aerodynamic efficiency, boosting glide distance potential. So, when comparing gliders, look beyond just glide ratios—consider how their aerodynamic qualities influence their overall distance capabilities. Additionally, understanding the impact of wing design can help in selecting the most efficient glider for specific conditions.
Efficiency in Flight
To accurately compare different gliders, it’s important to understand how glide ratios reflect their aerodynamic efficiency. A higher glide ratio means the glider can travel farther horizontally for each unit of altitude lost, indicating better efficiency. The key factor influencing this efficiency is wing design; streamlined wings with smooth surfaces reduce drag and improve lift, boosting glide performance. Different gliders feature varying wing shapes, aspect ratios, and materials, all of which impact aerodynamic efficiency. By examining glide ratios, you can see which wing designs optimize lift-to-drag ratios. Ultimately, a glider with a superior glide ratio demonstrates how effective its wing design is at converting altitude into distance, making it a more efficient choice for longer flights. Additionally, aerodynamic efficiency depends heavily on minimizing drag and maximizing lift, which are directly influenced by wing geometry and surface quality.
Why a Higher Glide Ratio Means Better Performance

A higher glide ratio indicates that an aircraft or glider can travel farther horizontally for every unit of altitude lost, which directly translates to better performance. This improved glide ratio reflects superior aerodynamic efficiency, meaning less drag and more effective lift. When your aircraft has a higher glide ratio, you can cover greater distances without losing altitude quickly, giving you more control and flexibility during flight. To maximize this advantage, your pilot technique becomes essential—smooth control inputs and optimal flight path help maintain the best possible glide. Basically, a higher glide ratio means you get more distance out of each bit of altitude, making your flight more efficient and allowing you to reach your destination or landing zone with less effort.
Real-Life Scenarios Where Glide Ratio Matters

Glide ratio plays a crucial role in many real-life situations where maximizing distance or safety is essential. When flying a glider, understanding glide ratio helps optimize glider aerodynamics and ensures better flight safety. Here are key scenarios:
- Cross-country soaring: Pilots rely on glide ratio to plan routes that avoid terrain and conserve energy.
- Emergency landings: Knowing your glide ratio helps you select safe landing spots if engine failure occurs.
- Mountain flying: Glide ratio guides pilots in avoiding obstacles and managing altitude over rugged terrain.
- Flight training: Instructors emphasize glide ratio to teach students about safe glide angles and aircraft performance.
In each case, a solid grasp of glide ratio enhances safety and efficiency, making it an essential concept for any pilot.
Common Mistakes When Calculating Glide Ratio

One common mistake is not paying attention to units, which can lead to incorrect glide ratio calculations. Ignoring real-world conditions, like wind or weight, also skews your results. To get accurate measurements, you need to be precise and consider all relevant factors.
Overlooking Units Consistency
Overlooking units consistency is a common mistake that can lead to significant errors in calculating glide ratio. When you ignore units mismatch, measurement errors happen because distances and altitudes aren’t in the same units. To avoid this, keep these tips in mind:
- Always double-check units before performing calculations.
- Convert all measurements to a consistent unit system (e.g., meters or feet).
- Be cautious when using different data sources to ensure units match.
- Remember that small measurement errors can magnify due to units mismatch, skewing your glide ratio results.
Ignoring Real-World Conditions
Ignoring real-world conditions, such as wind, air temperature, and turbulence, can cause significant errors in your glide ratio calculations. These factors directly affect aerodynamic principles and how your aircraft’s wing design performs in different environments. Wind can alter your ground track, making your calculated glide distance inaccurate. Temperature changes impact air density, influencing lift and drag. Turbulence can cause unpredictable flight behavior, skewing your assumptions based on ideal conditions. Relying solely on idealized models neglects these variables, leading to overly optimistic or pessimistic glide estimates. To improve accuracy, consider how real-world conditions impact your aircraft’s aerodynamic performance and adjust your calculations accordingly. Recognizing these factors helps you develop a more realistic understanding of your glide capabilities.
Practice Problems to Master Glide Ratio Math

Practicing glide ratio problems is the best way to build confidence and improve your understanding of how altitude loss relates to distance traveled. These exercises help you see how factors like aerodynamic drag and wing design influence glide performance. To get started:
- Calculate glide distance using different glide ratios and altitudes.
- Adjust variables to see how increased aerodynamic drag reduces glide distance.
- Explore how changes in wing design affect the glide ratio.
- Create real-world scenarios to practice applying math to actual flight conditions.
Frequently Asked Questions
How Does Altitude Impact Glide Ratio Calculations?
Altitude effects are vital in glide calculations because higher altitudes mean thinner air, which impacts lift and drag. As you gain altitude, your glide ratio can improve since the aircraft can stay airborne longer before descending. Conversely, at lower altitudes, the glide ratio might decrease due to denser air. So, understanding altitude effects helps you accurately determine your glide distance and plan your descent effectively.
Can Glide Ratio Be Different for Various Aircraft Types?
You might notice glide ratios vary between different aircraft types. Factors like aircraft weight and wing design play a vital role; lighter planes often glide farther, while wings with better lift-to-drag ratios improve glide performance. Each aircraft is engineered differently, so their glide ratios aren’t the same. Understanding these differences helps you predict how far an aircraft can glide, depending on its unique design features and weight distribution.
What Role Does Air Density Play in Glide Performance?
Imagine you’re sailing a boat through foggy waters; denser air acts like thick fog, making your glide less efficient. When air density is high, your aircraft faces more drag, reducing glide efficiency. Conversely, in thinner air, you glide farther because there’s less resistance. So, air density markedly influences your glide performance, with denser air decreasing your glide ratio, while lower density helps you cover more distance effortlessly.
How Do Pilot Techniques Influence Effective Glide Ratio?
Your pilot skill greatly influences your effective glide ratio by enabling precise control and smooth adjustments during descent. For example, well-trained pilots enhance aircraft weight and attitude, reducing drag and maintaining ideal glide angles. By managing airspeed and descent path carefully, you can extend your glide distance. Skilled pilots also anticipate changing conditions, making timely corrections that maximize efficiency, ensuring you get the most from your aircraft’s glide capabilities.
Is Glide Ratio Relevant in Emergency Glide Scenarios?
In emergency glide scenarios, understanding the glide ratio is essential, despite common glide ratio myths and emergency glide misconceptions. You might hear that glide ratio isn’t relevant, but in reality, it helps you estimate how far you can glide to safety. Recognizing the true glide ratio guides your decisions, reduces panic, and improves your chances of reaching a safe landing spot. Don’t let misconceptions hinder your ability to handle emergencies effectively.
Conclusion
Now that you’ve learned to see the glide ratio clearly, visualize your aircraft soaring smoothly, gliding gracefully, and landing safely. With simple math as your guide, you can understand the path ahead, predict the distance, and improve your skills. Remember, a higher glide ratio means better performance, just like a bird soaring effortlessly. Keep practicing, stay confident, and let your knowledge elevate your flying—turning complex numbers into your wings for success.