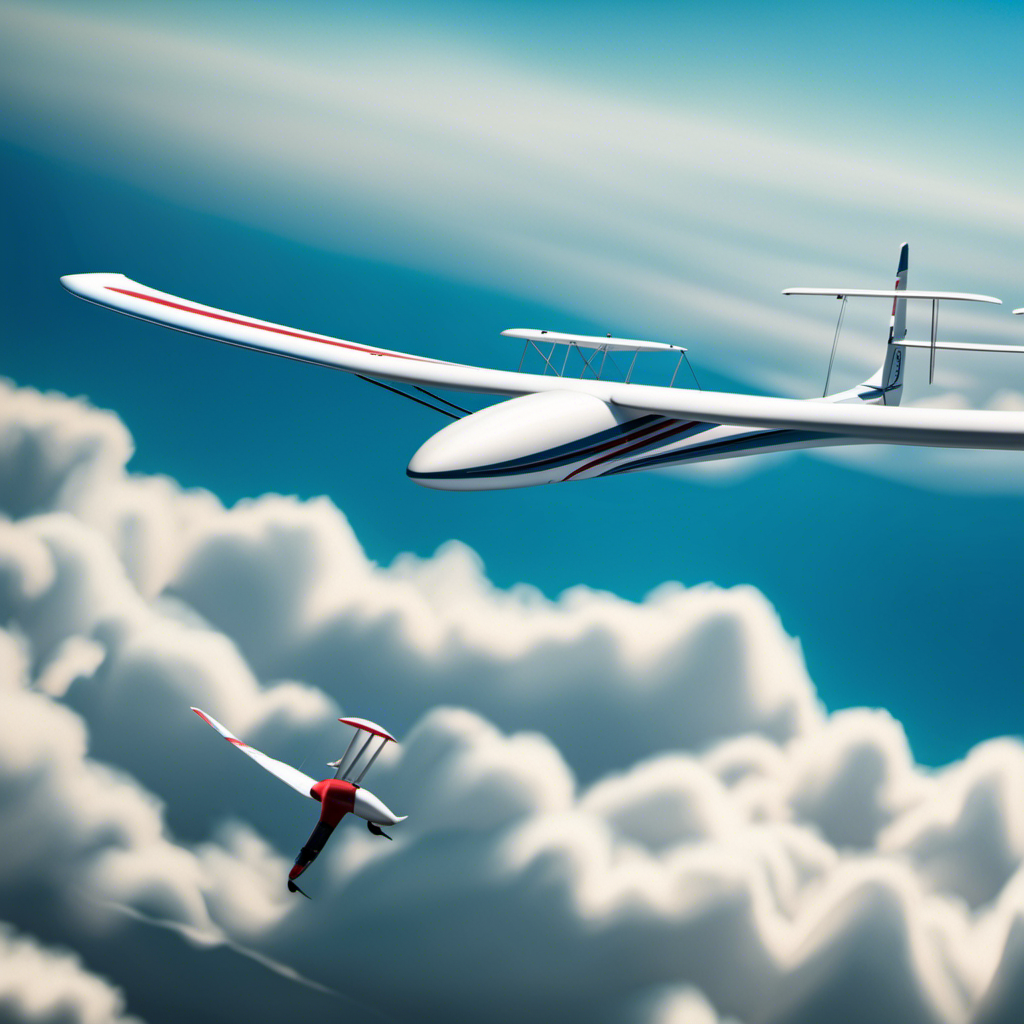

I have always been fascinated by the intricacies of flight dynamics as a glider pilot.
One particular aspect that has captured my attention is the sink rate of a glider.
It’s the rate at which the glider descends through the air when no lift is present.
Understanding this concept is crucial for maximizing glide performance and achieving efficient flights.
In this article, we’ll delve into the factors that influence sink rate, explore the significance of air density and wing design, and provide tips for managing and improving this critical aspect of glider flight.
Key Takeaways
- Sink rate is influenced by factors such as glider design, weight, angle of attack, air density, and glide ratio.
- Pilots can adjust the angle of attack to minimize sink rate.
- Gliders with higher glide ratios have lower sink rates.
- Techniques such as maintaining a smooth and clean glider configuration, optimizing ballast distribution, and utilizing thermals can help reduce sink rate.
As an affiliate, we earn on qualifying purchases.
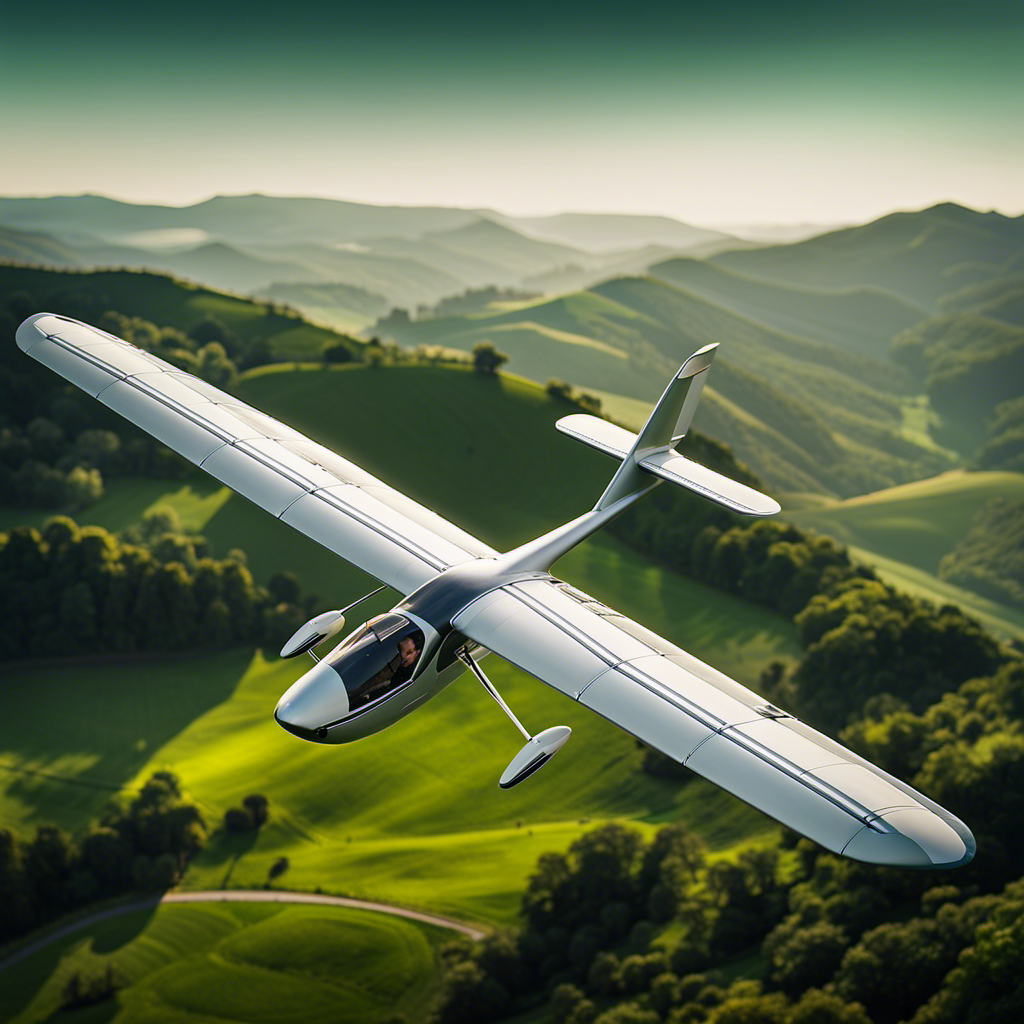
Understanding Glider Flight Dynamics
To understand glider flight dynamics, you’ll need to know the sink rate of a glider. Glider performance is greatly influenced by the aerodynamic forces acting upon it. These forces can be broken down into four main components: lift, drag, weight, and thrust.
Lift is the force that opposes gravity and keeps the glider in the air. Drag is the resistance encountered by the glider as it moves through the air. Weight is the force exerted by gravity on the glider, pulling it downwards. Thrust is the force generated by the glider’s propulsion system, if it has one.
The sink rate of a glider refers to the rate at which it descends in still air when the pilot is not actively trying to maintain or gain altitude. It is influenced by various factors, such as the glider’s design, weight, and the angle of attack. A glider with a lower sink rate is more efficient and can stay in the air for longer periods of time without losing altitude rapidly.
Now that we have established the importance of understanding glider flight dynamics and the role of aerodynamic forces, let’s delve into the concept of sink rate and its significance in glider performance.
The Concept of Sink Rate
You can understand how quickly a glider descends by considering its rate of descent in still air. The sink rate refers to the speed at which a glider descends when no thermals or updrafts are present. It is an important concept to grasp for glider pilots, as it affects the overall performance and efficiency of the aircraft.
Here is a practical explanation of the concept and its application:
-
Sink rate is influenced by the glider’s design and weight. A lighter glider will generally have a lower sink rate compared to a heavier one.
-
The angle of attack also plays a role in determining sink rate. A higher angle of attack will increase drag and result in a higher sink rate.
-
Air density affects sink rate. In denser air, the glider will experience more lift, reducing the rate of descent.
-
Glide ratio is another factor to consider. Gliders with a higher glide ratio will have a lower sink rate, allowing them to maintain altitude for longer periods.
Understanding the concept of sink rate and its practical application is essential for glider pilots to effectively manage their descent and maximize their flight performance.
Now, let’s explore the various factors that influence sink rate.
Factors Influencing Sink Rate
When considering factors that influence how quickly a glider descends, it’s important to take into account its design, weight, angle of attack, air density, and glide ratio.
The airfoil design plays a crucial role in determining the sink rate of a glider. The shape and contour of the wings affect the lift generated and the overall aerodynamic efficiency. A well-designed airfoil can reduce drag and increase lift, resulting in a slower descent. On the other hand, a poorly designed airfoil can increase the sink rate, making the glider descend faster.
Another factor that affects the sink rate is the pilot technique. Pilots can adjust the angle of attack, which is the angle at which the wings meet the oncoming airflow. By finding the optimal angle of attack, pilots can minimize the sink rate and extend their glide. Furthermore, skillful pilots can make small adjustments to the control surfaces to fine-tune the glider’s performance and reduce the sink rate.
Considering the air density is crucial in understanding the sink rate of a glider. A higher air density provides more lift, resulting in a slower descent. In contrast, lower air density reduces lift and increases the sink rate. By understanding how the air density changes with altitude and weather conditions, pilots can make informed decisions to optimize their glider’s descent.
Air Density
The air density affects the performance of a glider, influencing its descent speed and lift generation. Air density is determined by the air pressure and temperature variation in the atmosphere.
Here are three key points to understand about air density:
-
Air Pressure: As the air pressure decreases, the air density also decreases. This means that at higher altitudes, where the air pressure is lower, the air density is lower as well. This can affect the glider’s descent speed, as the lower air density provides less resistance.
-
Temperature Variation: Temperature changes also affect air density. When the temperature decreases, the air density increases, and vice versa. This is because colder air molecules are closer together, making the air denser. Therefore, at colder temperatures, the glider will experience a higher air density, which can impact its lift generation.
-
Performance Impact: The variations in air density can significantly impact the performance of a glider. A higher air density can provide more lift, allowing the glider to maintain altitude or even climb. On the other hand, a lower air density can result in reduced lift and increased descent speed.
Understanding the relationship between air density, air pressure, and temperature variation is crucial in optimizing the performance of a glider. Transitioning to the subsequent section about wing design, it is important to consider how the glider’s wings are designed to take advantage of these factors.
Wing Design
Wing design plays a crucial role in optimizing the performance of a glider. Factors such as air density, air pressure, and temperature variation are taken into account. The aerodynamics of the wing shape directly affect the lift and drag forces experienced during flight. To maximize lift, glider wings typically have a curved shape on the upper surface, called the camber. This camber creates a pressure difference between the upper and lower surfaces, generating lift. Other design elements, such as winglets or wingtip devices, help reduce drag and improve efficiency. The wing’s aspect ratio, the ratio of its span to average chord, is also important. Higher aspect ratio wings produce less induced drag, resulting in a higher glide ratio and improved efficiency. As a glider pilot, understanding wing design and its effect on aerodynamics is essential for optimal performance.
The next consideration in optimizing a glider’s performance is its weight.
Glider Weight
During the previous subtopic, we discussed the importance of wing design in a glider. Now, let’s shift our focus to another crucial factor that affects glider performance: glider weight.
Glider weight plays a significant role in determining the overall performance and handling characteristics of a glider. The weight of the glider is directly related to its wing loading, which is the amount of weight that each square foot of wing area must support.
To understand the impact of glider weight on wing loading, let’s take a look at the following table:
| Glider Weight (lbs) | Wing Area (sq ft) | Wing Loading (lbs/sq ft) |
|---|---|---|
| 600 | 100 | 6 |
| 800 | 100 | 8 |
| 1000 | 100 | 10 |
| 1200 | 100 | 12 |
| 1400 | 100 | 14 |
As we can see from the table, as the glider weight increases, the wing loading also increases. Higher wing loading leads to increased stall speed and reduced maneuverability. On the other hand, lower wing loading allows for slower flying speeds and more maneuverability.
Managing glider weight is crucial for maintaining optimal wing loading and ensuring safe and efficient flight. It is essential to carefully consider the weight of the glider, including any additional equipment or cargo, to maintain the desired wing loading.
Now, let’s transition into the subsequent section where we will discuss the importance of managing sink rate in glider flight.
Importance of Managing Sink Rate
Managing sink rate is crucial for maintaining safe and efficient flight in a glider. As a pilot, I understand the importance of optimizing glide performance to maximize efficiency and minimize the rate at which the glider descends. Here are some key factors to consider when managing sink rate:
-
Angle of attack: Adjusting the angle of attack can significantly impact the sink rate. By finding the optimal angle, the glider can achieve the best lift-to-drag ratio, resulting in a reduced sink rate.
-
Airspeed control: Maintaining the appropriate airspeed is essential for managing sink rate. Flying too slow can increase the sink rate, while flying too fast can decrease lift. Finding the right balance is critical.
-
Utilizing thermals: Thermals are pockets of rising warm air that can provide lift to the glider. By effectively identifying and utilizing thermals, pilots can reduce sink rate and extend their flight time.
-
Energy management: Properly managing the energy in the glider is crucial for optimizing glide performance. This involves using potential energy gained from altitude and converting it into kinetic energy to maintain speed and reduce sink rate.
By implementing these techniques, pilots can effectively manage sink rate and enhance glide performance.
In the next section, we will explore various techniques for reducing sink rate without compromising safety or efficiency.
Techniques for Reducing Sink Rate
In my previous discussion on the importance of managing sink rate, I highlighted the need for glider pilots to minimize the rate of descent in order to maximize their flight time and reach their desired destinations. Now, let’s delve into some techniques for reducing sink rate and improving overall glider performance.
One key aspect of reducing aerodynamic drag is to maintain a smooth and clean glider configuration. This involves ensuring that all control surfaces are properly aligned, with no unnecessary gaps or protrusions. By regularly inspecting and maintaining the glider’s surfaces, pilots can minimize the negative impact of drag on their sink rate.
Another technique for reducing sink rate is through optimizing ballast. By adjusting the distribution and amount of weight carried by the glider, pilots can achieve a more balanced and efficient flight. Adding or removing ballast can help to optimize the glider’s center of gravity, allowing for improved performance in terms of sink rate and overall glide ratio.
To provide a visual representation of these techniques, I have created a table below that compares the impact of different aerodynamic configurations and ballast settings on the sink rate of a glider:
| Technique | Sink Rate Reduction |
|---|---|
| Streamlining Surfaces | 10-15% |
| Control Surface Alignment | 5-10% |
| Optimal Ballast Distribution | 10-20% |
| Total Reduction | 25-45% |
By implementing these techniques, glider pilots can significantly reduce their sink rate, improving their efficiency and extending their flight time. Now, let’s explore some soaring techniques that can further enhance glider performance.
SUBSEQUENT SUBTOPIC: ‘Soaring Techniques’
Soaring Techniques
To maximize flight time and efficiency, glider pilots can employ various techniques to enhance their soaring performance. Here are four key soaring techniques that can be utilized:
-
Ridge Soaring: This technique involves flying along the edge of a ridge or mountain, using the upward wind generated by the terrain to gain altitude. By carefully positioning the glider and utilizing the lift created by the wind hitting the slope, pilots can maintain a steady altitude and extend their flight time.
-
Wave Soaring: In areas with strong winds blowing over mountain ranges, wave soaring can be employed. This technique involves riding the standing waves of air that are generated by the wind hitting the mountains. By flying in and out of these waves, glider pilots can gain significant altitude and cover long distances.
-
Thermal Soaring: Thermals are columns of rising warm air that can provide lift for gliders. By circling within a thermal, pilots can gain altitude and prolong their flight. Observing cloud formations, temperature differentials, and other indicators can help glider pilots locate and effectively use thermals to their advantage.
-
Dynamic Soaring: This advanced technique involves utilizing the energy of the wind to gain speed and altitude. By flying in a continuous loop between the upwind and downwind sides of a slope, glider pilots can harness the energy of the wind and achieve impressive speeds and altitudes.
By employing these soaring techniques and developing effective flight strategies, glider pilots can optimize their flight time and maximize their performance.
Transitioning into the subsequent section about ‘using thermals,’ glider pilots can also focus on identifying and utilizing thermals effectively to gain altitude and extend their flight duration.
Using Thermals
By circling within a thermal, pilots can experience an uplifting sensation as they gain altitude and extend their flight time. Thermal soaring is a technique used by glider pilots to optimize lift and stay aloft for longer periods. Thermals are pockets of warm air that rise from the surface due to temperature differences. As a pilot, I rely on my skill and knowledge to locate and utilize these thermals effectively.
To maximize the lift provided by thermals, I carefully observe the surroundings for visual cues. Factors such as cloud formations, wind patterns, and terrain features can indicate the presence of thermals. Once I identify a thermal, I enter it by flying in a circular pattern, known as circling. This allows me to stay within the core of the thermal, where the lift is strongest.
During the circling process, I continuously adjust my bank angle and airspeed to maintain a constant climb rate. By flying in tight circles and banking the glider appropriately, I can optimize my lift and gain altitude rapidly. This technique not only helps me extend my flight time but also allows me to explore new areas and enjoy the breathtaking views from higher altitudes.
Transitioning into utilizing ridge lift, another soaring technique, I focus on utilizing the wind that flows up the slopes of hills and mountains. This type of lift is created when the wind encounters an obstacle, causing it to rise and provide lift to the glider.
Utilizing Ridge Lift
Transitioning from utilizing thermals to utilizing ridge lift, I find myself soaring through the air with a renewed sense of exhilaration. Ridge lift is a technique that involves harnessing the rising air currents created when wind encounters an obstacle such as a mountain or a hill. It allows me to extend my flight time and cover greater distances while optimizing my glide performance.
As I glide along the ridge, I employ a set of ridge lift techniques that have been fine-tuned over years of experience. Here are three key strategies I employ:
-
Ridge selection: Carefully selecting the right ridge to fly along is crucial. I look for ridges with a consistent wind flow and a shape that promotes the generation of lift.
-
Flying close to the ridge: By flying as close as safely possible to the ridge, I maximize the lift generated by the wind as it is forced to rise along the obstacle.
-
Using ridge dynamics: Understanding the intricacies of the ridge dynamics allows me to identify areas of increased lift, such as ridge gaps or areas of convergence, and exploit them to my advantage.
By implementing these ridge lift techniques, I am able to extend my flight time and cover greater distances with maximum efficiency. This enhances my overall glide performance and allows me to reach new heights in my gliding adventures.
Transitioning into the subsequent section about calculating and measuring sink rate, I will now delve into the technical aspects of analyzing this crucial parameter of glider flight.
Calculating and Measuring Sink Rate
As I descend through the air, I can determine my sink rate by measuring the time it takes to lose altitude. Calculating the sink rate of a glider is crucial for maintaining control and maximizing efficiency during flight. Sink rate refers to the rate at which the glider descends in still air. To calculate this, I divide the change in altitude by the time it takes to descend. For example, if I descend 500 feet in 1 minute, my sink rate would be 500 feet per minute.
Measuring sink rate in real-time is essential for glider pilots to make informed decisions during flight. Variometers, also known as vertical speed indicators, are instruments used to measure the rate of climb or descent. These devices provide precise and accurate readings of the glider’s sink rate, allowing pilots to continuously monitor their vertical velocity.
Transitioning into the subsequent section about variometers, these instruments play a vital role in glider flying, providing real-time data on the vertical speed. By accurately measuring sink rate, variometers enable pilots to adjust their flight strategies and make the necessary corrections to maintain optimal performance in varying atmospheric conditions.
Variometers
To accurately measure your vertical speed during flight, you can rely on variometers. These instruments provide real-time data and allow for precise adjustments. Variometers are essential in gliders as they provide pilots with crucial information about their sink rate, or the rate of descent.
Here are four important factors to consider when using variometers for sink rate measurement:
-
Variometer Calibration: Before each flight, it is important to calibrate the variometer to ensure accurate readings. This involves setting the variometer’s reference point so that it indicates zero when the glider is in level flight.
-
Sink Rate Variation: Variometers are designed to detect even the slightest changes in sink rate. They provide continuous feedback to the pilot, allowing for adjustments to be made in real-time to maintain optimal performance.
-
Audible and Visual Indicators: Variometers often feature both audible and visual indicators to alert pilots of changes in sink rate. These indicators can help pilots make prompt adjustments to maintain a safe and efficient descent.
-
Sensitivity Adjustment: Variometers typically have a sensitivity adjustment feature that allows pilots to customize the instrument’s response to changes in sink rate. This ensures that the variometer provides the most accurate and relevant information possible.
With variometers, pilots can accurately measure their sink rate and make necessary adjustments to ensure a safe and efficient descent.
Moving on to sink rate indicators…
Sink Rate Indicators
When using sink rate indicators, you’ll find that they offer a clear visual display of your descent speed, helping you maintain a safe and efficient flight. Sink rate measurement is a crucial aspect of aviation, as it allows pilots to assess their rate of descent accurately.
Sink rate indicators are often incorporated into altimeters, which measure the altitude of an aircraft above a given reference point. These indicators provide real-time feedback on the rate at which the aircraft is descending, allowing pilots to make necessary adjustments to maintain a desired descent speed.
One important factor in sink rate measurement is altimeter accuracy. The altimeter is calibrated to provide accurate altitude readings, and this information is used in conjunction with the sink rate indicator to determine the rate of descent. If the altimeter is not accurate, it can lead to incorrect sink rate readings, which can be dangerous during flight.
As we transition to discussing the glide ratio, it’s important to note that the sink rate indicator plays a significant role in calculating this ratio. The glide ratio is a measure of how far the aircraft can travel horizontally for a given descent. By accurately measuring the sink rate, pilots can calculate the glide ratio and make informed decisions regarding their flight path and landing options.
Glide Ratio
You can calculate the glide ratio by dividing the distance traveled horizontally by the altitude lost during descent. The glide ratio is an important measure of glider performance, as it indicates how efficiently the glider can maintain altitude while covering horizontal distance. Optimizing glide performance is crucial for glider pilots, as it allows them to cover longer distances and stay in the air for extended periods of time.
To better understand the concept of glide ratio, let’s take a look at the following table:
| Altitude Lost (ft) | Distance Traveled (ft) |
|---|---|
| 1000 | 5000 |
| 2000 | 8000 |
| 3000 | 9000 |
| 4000 | 10000 |
As you can see from the table, the glide ratio improves as the altitude lost decreases and the distance traveled increases. This means that a glider with a higher glide ratio can cover more ground while losing less altitude.
The glide ratio is a key factor in optimizing glider performance. By adjusting their flight techniques, pilots can maximize their glide ratio and make the most of their altitude. This involves finding the optimal airspeed, utilizing thermals and updrafts, and making efficient turns.
Understanding the glide ratio is just one aspect of glider performance. Now, let’s explore the role of sink rate in glider safety.
The Role of Sink Rate in Glider Safety
Understanding the role of sink rate is crucial for ensuring glider safety. Sink rate refers to the rate at which a glider descends in still air, and it is influenced by various factors, including the presence of thermals and the impact of wind.
Thermals, which are columns of rising air, play a significant role in determining the sink rate of a glider. When a glider encounters a thermal, it can climb or maintain altitude, effectively reducing the sink rate.
On the other hand, wind can have a significant impact on sink rate. Headwind can increase the sink rate by pushing the glider down faster, while tailwind can decrease the sink rate by providing additional lift. It is important for glider pilots to understand the effects of wind on sink rate to make accurate calculations and adjustments during flight.
Transitioning into the subsequent section about sink rate in different weather conditions, it is important to note that sink rate can vary depending on the prevailing weather conditions.
Sink Rate in Different Weather Conditions
In different weather conditions, it’s crucial to consider how various factors impact the descent speed of a glider.
When it comes to thermic lift, the glider can experience an upward force due to the rising air currents caused by the heating of the Earth’s surface. This thermic lift can significantly reduce the sink rate of the glider, allowing it to stay aloft for longer periods.
On the other hand, dynamic soaring can also affect the sink rate of a glider. By utilizing the wind gradient, the glider can gain energy and increase its airspeed, resulting in a reduced sink rate. This technique is commonly used by experienced glider pilots to maintain altitude and extend their flight time.
Understanding these factors and their impact on the sink rate is essential for glider pilots to make informed decisions during their flights.
Transitioning into the subsequent section about thermal conditions, it is important to explore how these weather patterns can further influence the sink rate of a glider.
Thermal Conditions
To effectively navigate thermal conditions, it’s crucial to anticipate the rising air currents caused by the heating of the Earth’s surface. Thermal lift is a key phenomenon that glider pilots rely on to gain altitude and stay airborne. As a glider pilot, I understand the importance of accurately measuring the sink rate to optimize my flight performance.
One method used to measure sink rate is through the use of variometers. These instruments provide real-time information on the rate of descent, allowing me to make adjustments accordingly. By monitoring the variometer, I can determine if I am in a thermal updraft or a sinking air mass. This knowledge is vital for maximizing my time in the air and avoiding areas of sinking air.
In thermal conditions, it’s essential to recognize the characteristics of a thermal and use them to my advantage. Thermals are often marked by visible indicators such as cumulus clouds or dust devils. By observing these signs, I can identify areas of thermal activity and position myself to exploit the rising air currents.
To further illustrate the importance of understanding thermal lift and sink rate measurement, consider the following table:
| Situation | Sink Rate Measurement | Action |
|---|---|---|
| Strong Thermal | High sink rate | Stay in thermal core |
| Weak Thermal | Low sink rate | Search for stronger lift |
| Sinking Air Mass | High sink rate | Exit and search for lift |
| No Thermal Activity | Zero sink rate | Transition to wave conditions |
Understanding the sink rate measurement and utilizing thermal lift effectively is crucial for a glider pilot to stay airborne and maximize their flying experience. By anticipating these thermal conditions, I can make informed decisions and transition into wave conditions for further exploration.
Wave Conditions
When flying in wave conditions, you can harness the powerful updrafts created by strong winds interacting with terrain features to gain significant altitude. Wave patterns occur when a stable layer of air is forced to rise over a mountain range, creating a series of standing waves in the atmosphere. These waves can extend for hundreds of kilometers and provide glider pilots with a unique opportunity to soar to great heights.
Here are five key aspects of flying in wave conditions:
-
Wave lift is typically strongest on the windward side of the mountain range, where the air is forced to rise and form the standing waves.
-
The spacing between wave crests can vary, ranging from a few kilometers to tens of kilometers. Understanding the pattern of these waves is crucial for maximizing altitude gain.
-
The vertical speed of wave lift can be quite remarkable, often exceeding 10 meters per second. This rapid upward motion allows gliders to climb rapidly and reach altitudes well above their starting point.
-
To effectively use wave lift, pilots must navigate within the wave patterns, carefully positioning themselves to catch the strongest updrafts and avoid areas of sinking air.
-
The presence of wave lift can be predicted by studying meteorological forecasts, which provide valuable information on wind speed, direction, and stability.
In wave conditions, glider pilots can experience the thrill of climbing to incredible heights using the energy of the atmosphere. Transitioning to ridge soaring conditions, pilots can continue to enjoy the dynamic interaction between wind and terrain.
Ridge Soaring Conditions
After discussing wave conditions, let’s now shift our focus to ridge soaring conditions. Ridge soaring is a technique that allows glider pilots to utilize the windward slope of a ridge to gain altitude and stay aloft. This technique is particularly useful when wave conditions are not present or when pilots want to maximize their flying time in a specific area.
To effectively soar along a ridge, pilots must carefully analyze the ridge lift. Ridge lift is created when the wind encounters an obstacle, such as a mountain ridge, and is forced to rise. This upward motion of the air provides glider pilots with the necessary lift to maintain altitude.
Ridge lift analysis involves studying the wind direction, speed, and the shape of the ridge to determine the most advantageous positions to fly. By positioning the glider in areas of maximum lift, pilots can harness the power of the ridge to maintain height and even gain altitude.
Understanding ridge soaring techniques and conducting a thorough ridge lift analysis are crucial for successful soaring along ridge lines. By mastering these skills, pilots can optimize their flight experience and extend their time in the air.
Transitioning into the subsequent section about sink rate and glider performance, let’s now delve into the factors that affect a glider’s sink rate and how it impacts overall performance.
Sink Rate and Glider Performance
By understanding how different factors affect your descent speed and overall performance, you can make informed decisions while flying.
When it comes to glider performance, one key factor to consider is the sink rate. The sink rate of a glider refers to how quickly it descends in still air. It is influenced by several factors, including the weight of the glider, the wing loading, the airfoil design, and the pilot’s technique.
To optimize glider efficiency and minimize the sink rate, it is important to understand the concept of glide performance. This refers to the ability of a glider to maintain altitude while covering a certain distance. By adjusting the angle of attack, speed, and other variables, a pilot can maximize the glide performance and minimize the sink rate. This knowledge allows for more efficient flying, conserving energy and increasing the glider’s range.
Transitioning into the next section about the performance polar, it is important to note that the sink rate is one of the key parameters used to construct this performance chart.
Performance Polar
As we explored in the previous section, understanding the sink rate of a glider is crucial for evaluating its performance. Now, let’s dive deeper into the concept of the Performance Polar, which is a graph that displays the relationship between the glider’s airspeed and its sink rate.
The Performance Polar is a valuable tool for pilots as it provides essential information about glider efficiency. By analyzing this graph, we can determine the optimal climb angle for the glider.
Here are three key points to consider when examining the Performance Polar:
-
Minimum Sink Speed: This is the airspeed at which the glider experiences the least amount of sink. It represents the point of maximum glider efficiency, allowing pilots to climb most effectively.
-
Best Glide Speed: This is the airspeed at which the glider covers the greatest horizontal distance for a given altitude loss. It is essential to master this speed to maximize the glider’s range and endurance.
-
Maximum L/D Speed: This is the airspeed that provides the highest lift-to-drag ratio for the glider. Operating at this speed yields the most efficient glide performance, allowing the glider to maintain altitude for the longest possible distance.
By understanding these three critical speeds, pilots can optimize their glider’s performance during various flight conditions.
Now, let’s explore the concept of the best glide speed, which is closely related to the Performance Polar.
Best Glide Speed
The best glide speed is crucial for maximizing the range and endurance of the aircraft. Optimizing glide speed is essential to achieve the best glide performance, allowing the aircraft to cover the maximum distance while descending. To determine the best glide speed, several factors must be taken into account, including the aircraft’s weight, aerodynamic characteristics, and wind conditions.
When flying at the best glide speed, the aircraft experiences the least amount of drag, resulting in the longest possible glide. This speed is typically indicated in the aircraft’s flight manual and can be determined experimentally during flight testing. It is important to note that the best glide speed may vary depending on the specific aircraft model.
By flying at the best glide speed, pilots can effectively manage their energy and extend their flight time. This is especially critical in emergency situations, where maintaining a safe altitude until landing is crucial. Additionally, optimizing glide speed allows pilots to take advantage of favorable wind conditions, further enhancing the aircraft’s range and endurance.
Transitioning to the next section, it is important to note that while the best glide speed maximizes the distance covered, it may not necessarily minimize the rate of descent. To achieve the lowest possible sink rate, pilots must utilize the minimum sink speed, which will be discussed in the following section.
Minimum Sink Speed
To achieve the slowest possible descent, you’ll want to determine the minimum sink speed for your aircraft. This is the speed at which your glider will descend at the lowest rate in still air conditions. The minimum sink speed is important because it allows you to stay aloft for longer periods of time, maximizing your flight time and distance.
Here are three factors to consider when determining the minimum sink speed:
-
Thermalling techniques: Efficient thermalling techniques can help reduce your sink rate. By finding and circling in rising air currents, known as thermals, you can counteract the natural descent of your glider and maintain altitude. Mastering thermalling techniques is crucial for achieving the slowest possible descent.
-
Impact of wind: The wind can have a significant impact on your sink rate. Flying into a headwind can increase your sink rate, while flying with a tailwind can decrease it. Understanding how wind affects your glider’s performance is essential for optimizing your descent speed.
-
Aircraft configuration: The configuration of your aircraft, such as wing flaps and airbrakes, can also affect your sink rate. Experimenting with different configurations and understanding how they impact your descent speed will help you determine the minimum sink speed for your specific glider.
Tips for Managing and Improving Sink Rate
As I mentioned earlier, achieving the minimum sink speed is crucial for maximizing the glide ratio of a glider. However, there are other techniques and strategies that can be employed to manage and improve the sink rate. These techniques take into account various factors such as thermic activity and adjusting ballast.
Thermic activity refers to the movement of warm air currents, which can be harnessed to gain altitude and reduce the sink rate. By staying alert to signs of thermals, such as cumulus clouds or birds circling in a particular area, a pilot can adjust their flight path to take advantage of these rising air currents. This can significantly reduce the sink rate and increase the overall efficiency of the glider.
Another technique for managing the sink rate is adjusting the ballast. Ballast refers to the additional weight that can be added or removed from the glider to optimize its performance. By carefully adjusting the ballast based on the prevailing conditions, a pilot can fine-tune the sink rate and achieve a more favorable glide ratio.
To summarize these techniques, I have created a table below that outlines the tips for managing and improving sink rate:
| Technique | Description |
|---|---|
| Monitoring thermic activity | Stay alert to signs of thermals such as cumulus clouds or circling birds. |
| Adjusting ballast | Carefully add or remove weight to optimize the glider’s performance. |
| Fine-tuning flight path | Make adjustments to take advantage of rising air currents and reduce sink rate. |
Frequently Asked Questions
How does air temperature affect the sink rate of a glider?
Air temperature has a significant impact on the sink rate of a glider. As altitude increases, air temperature generally decreases, causing the glider to sink faster. Similarly, higher wind speeds also increase the sink rate of a glider.
What are the typical sink rate values for gliders?
Typical sink rate values for gliders range from 0.5 to 1.5 meters per second. The sink rate is influenced by factors such as air temperature, wind speed, glider weight, and wing design.
Can the sink rate of a glider be influenced by pilot technique?
Yes, the sink rate of a glider can be influenced by pilot technique. Factors such as controlling airspeed, managing weight and balance, and utilizing efficient soaring techniques can all affect the glider’s sink rate. Additionally, changes in air pressure can also impact the sink rate.
Are there any specific weather conditions that can significantly increase or decrease the sink rate of a glider?
Thermal activity and wind conditions can greatly impact the sink rate of a glider. Strong thermals can provide lift, reducing the sink rate, while turbulent wind conditions can increase it.
How does the weight of a glider affect its sink rate?
The weight of a glider has a direct impact on its sink rate. A heavier glider will experience a higher sink rate due to increased gravitational forces. This effect is influenced by altitude and the design of the glider’s wings.
Conclusion
In conclusion, understanding the sink rate of a glider is crucial for pilots to effectively manage their flight. By considering factors such as air density, wing design, and performance polar, pilots can optimize their glide performance.
One interesting statistic to note is that the best glide speed for most gliders is typically around 45-50 knots, where the sink rate is at its lowest. By maintaining this speed and employing techniques to minimize drag, pilots can maximize their gliding distance and improve their overall flight experience.